Porsche 993: How to Replace Front Lower Ball Joint
The ball joints on a Porsche 993 are the link between the lower control arms and front shocks. A worn or damaged ball joint can limit your ability to control the vehicle and can place additional stress on surrounding components. Learn how to replace them here.
This article applies to the Porsche 993 (1993-1998).
A ball joint is a spherical link that plays a crucial role in the steering and suspension of the Porsche 993. Ball joints have an extensive range of motion which makes them ideal for tying the front lower control arms to the suspension uprights. Although ball joints are fairly robust and made to last, dirt, moisture, and everyday stress can cause wear in the ball joints that will adversely affect the operation of the vehicle. Often due to contamination, a failing ball joint will affect alignment and ultimately cause steering, handling, and tire wear issues. Ball joints should be routinely inspected for wear and replaced if necessary. This article will provide a step-by-step procedure for replacing the ball joints located on the front lower control arms of the 993.

Materials Needed
- Floor jack & jack stands
- Metric combination wrench set
- Torx & Allen sockets and ratchet
- Ball joint separating tool or hammer
- Penetrating oil
Step 1 – Lift car and remove front wheels
To gain access to the lower control arm ball joints, lift the vehicle and support it with jack stands. With the front end supported, remove the front wheels.
(Related Article: How to Jack Up Your 993 - Rennlist.com)

Step 2 – Remove caster eccentric
- Before removing the caster eccentric from the lower control arm, mark its orientation. This adjustment setting will be used during reassembly.

Figure 2. Location of caster eccentric on lower control arm. 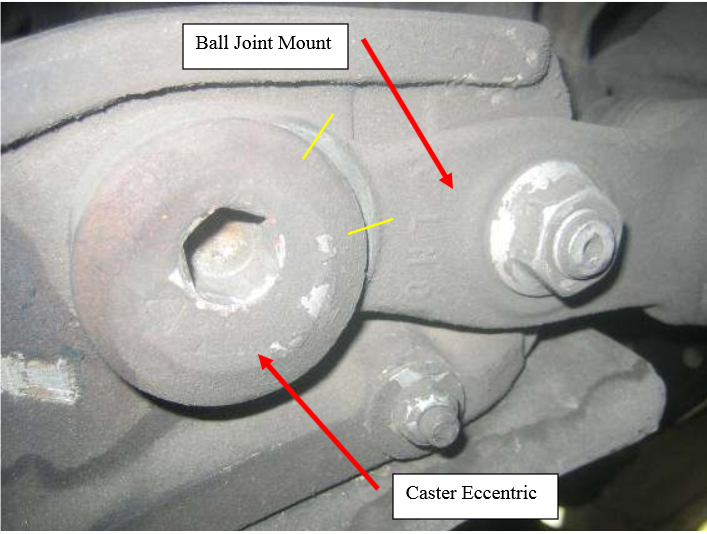
Figure 3. Mark the orientation of eccentric.
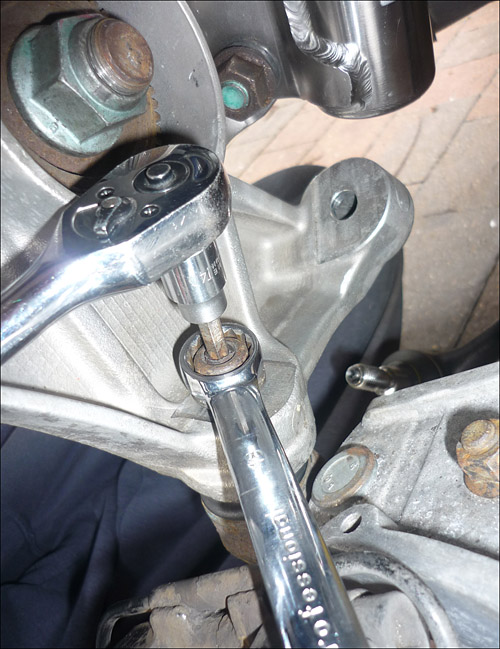
- Remove the 10mm nut securing the eccentric to the lower control arm.
- Remove eccentric from lower control arm.
Pro Tip
The eccentric may be rusted or frozen in the lower control arm. The use of penetrating oil on the eccentric several hours before disassembly will aid in removal.
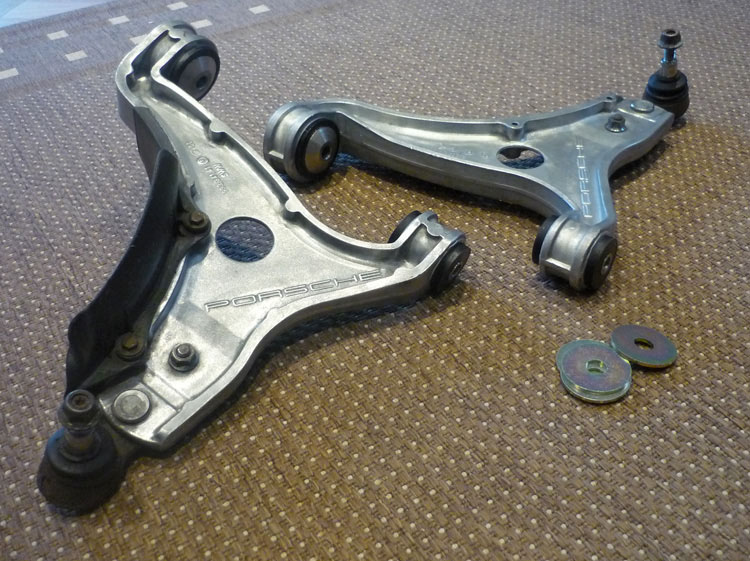
Figure 4. Top view of lower control arm and eccentric nut. 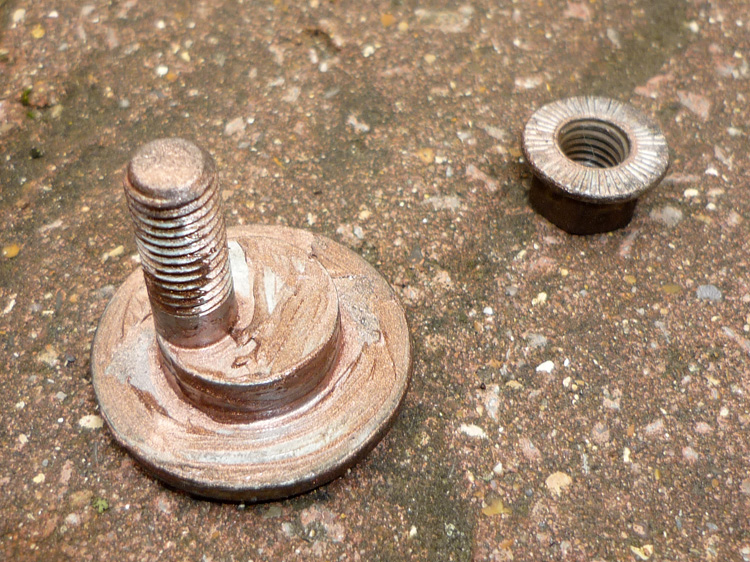
Figure 5. Eccentric removed from lower control arm.
Step 3 – Separate lower control arm from suspension upright
- Using a 19mm wrench, undo the nut securing the ball joint to the suspension upright.
- Using a ball joint separating tool, pickle fork or hammer, separate the lower control arm from the suspension upright. This usually takes a bit of force before the ball joint will pop out.
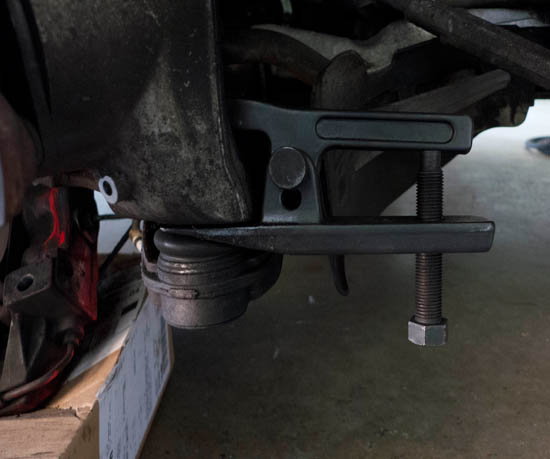
Figure 7. Separating control arm from upright. 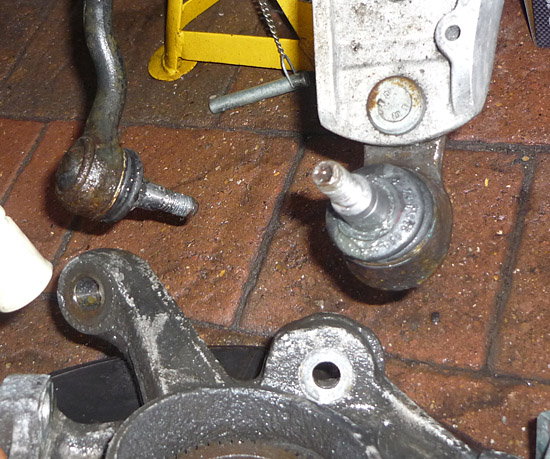
Figure 8. Ball joint free from upright.
Step 4 – Replace ball joint
- On the underside of the lower control arm, remove the nut securing the ball joint.
- Remove old ball joint and install new ball joint to lower control arm.

Step 5 – Attach control arm to upright
- For the easiest installation of the new ball joint into the suspension upright, a load should be placed on the suspension. This is best accomplished using a floor jack under the lower control arm to press the ball joint into its tapered hole. Excessive pressure is not needed.
- With the ball joint secured in the upright, tighten the nut to 55 ft-lbs.

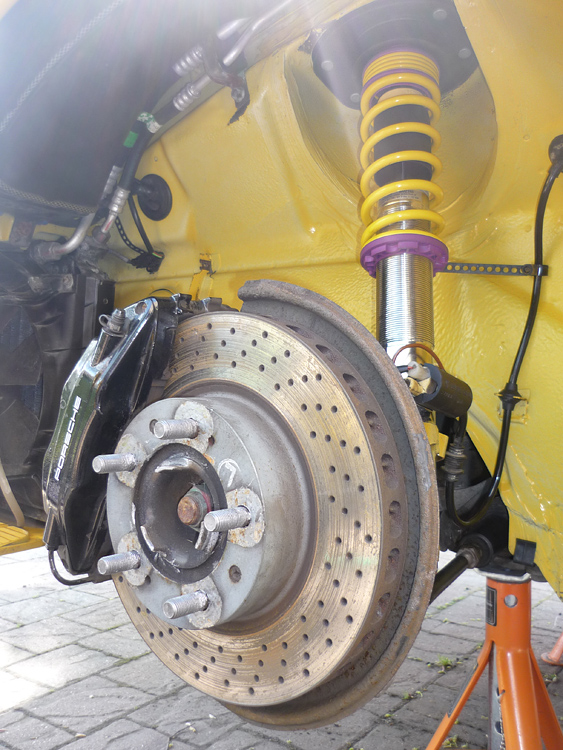
Figure 10. Ball joint installed in upright.
Step 6 – Reinstall eccentric and wheel
- Reinstall the eccentric, making sure to set its orientation to the previously marked setting. This will ensure a proper caster setting.
- Reinstall wheels and lower vehicle.
Related Discussions
- Ball Joint Alignment - Rennlist.com
- Caster Eccentric -Rennlist.com
- Front Ball Joint Removal on a C4 - Rennlist.com