Porsche 993: How to Replace Fuel Filter
A clogged fuel filter can cause a plethora of problems that are detrimental to the proper operation of the Porsche 993 engine. If you are having hard starting issues, engine stalling, rough running, or fuel starvation under acceleration, your fuel filter may be the culprit. Learn how to replace it here.
This article applies to the Porsche 993 (1993-1998).
Although today's fuels are highly refined, they still contain trace amounts of dirt and debris. This dirt and debris is typically collected by the fuel filter and allows clean fuel to make its way to the fuel injectors. However, as time passes, the fuel filter can become highly contaminated and affect the engine's ability to run properly. Porsche recommends changing the fuel filter during the 60,000 mile maintenance schedule. Many owners opt to do this sooner, especially if they live in an area with poor fuel quality or the car has been sitting for an extended period of time. Either way, the job is fairly straightforward and will keep your Porsche running great.

Materials Needed
- Two 19mm open-end wrenches
- 17mm open-end wrench
- 7mm nut driver or Phillips screwdriver
- 1/4" or 3/8" drive ratchet
- 10mm socket
- Shop rags to collect emerging fuel
Warning
You will be working with gasoline which is extremely flammable! It is important that the engine is cold, preferably after sitting overnight. Also, make sure the work area has adequate ventilation.
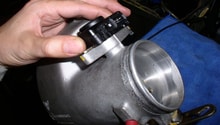
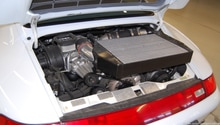
Step 1 – Remove the airbox
Remove the snorkel tube on the right by squeezing at the sides while twisting/pulling towards you. Undo the two hinged clips.
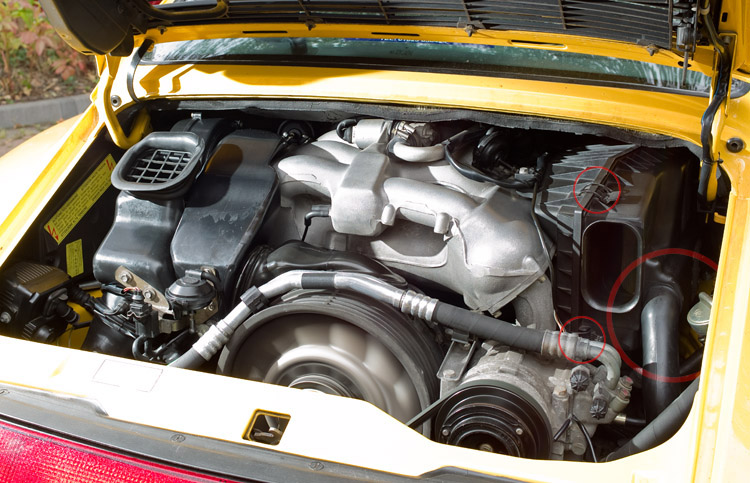
Using a 10mm socket on your ratchet, remove the support bolt for the left half of the airbox housing.
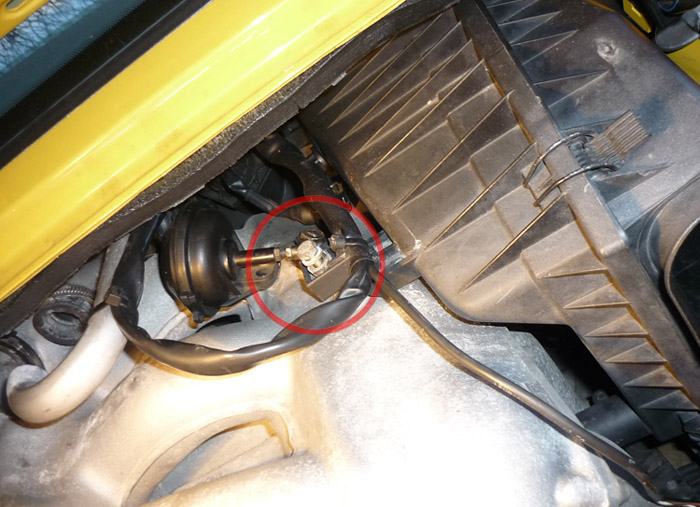
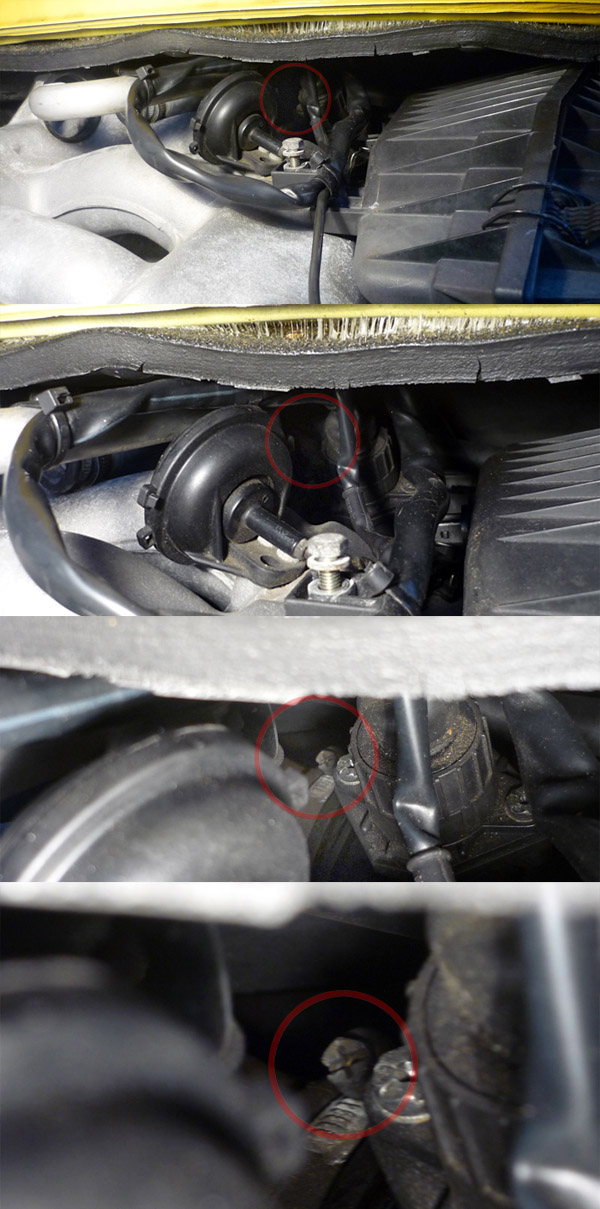
Loosen the clamp securing the intake boot to the airbox housing and mass airflow sensor using a 7mm socket or Phillips screwdriver. Be careful as there is a rubber sealing ring between the airbox housing and the mass airflow sensor that you do not want to drop. Also, be sure to disconnect the mass airflow sensor electrical connector (round plug to the right of the red circle in the images below).
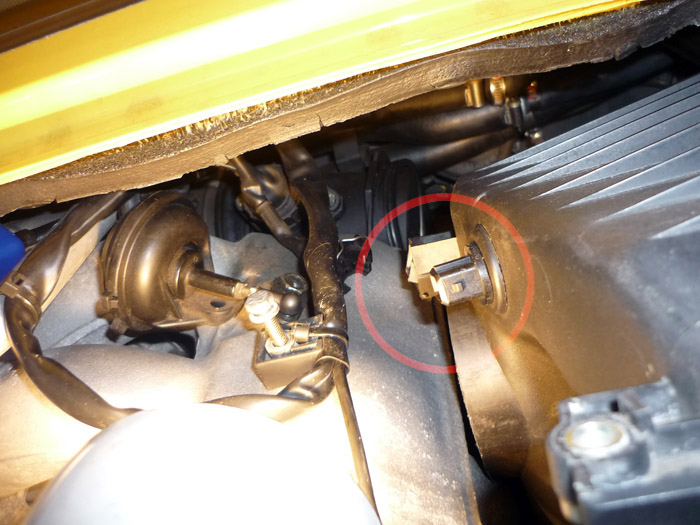
Remove the air temperature sensor electrical connector. Then, remove the airbox assembly from the engine bay.
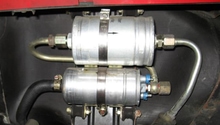
Step 2 – Remove fuel outlet line from filter
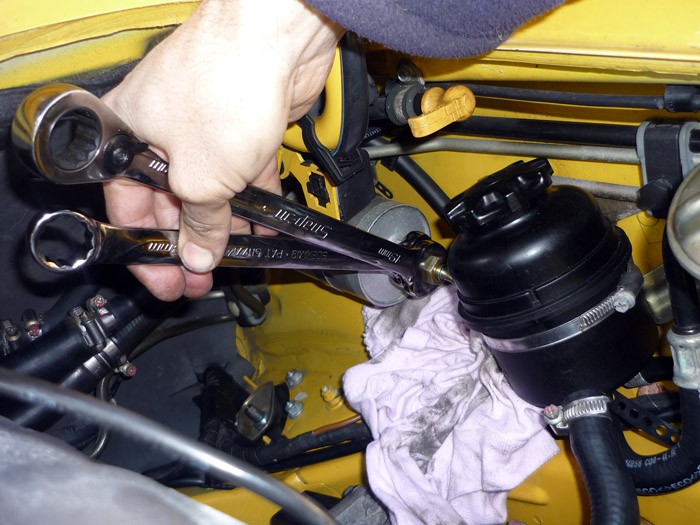
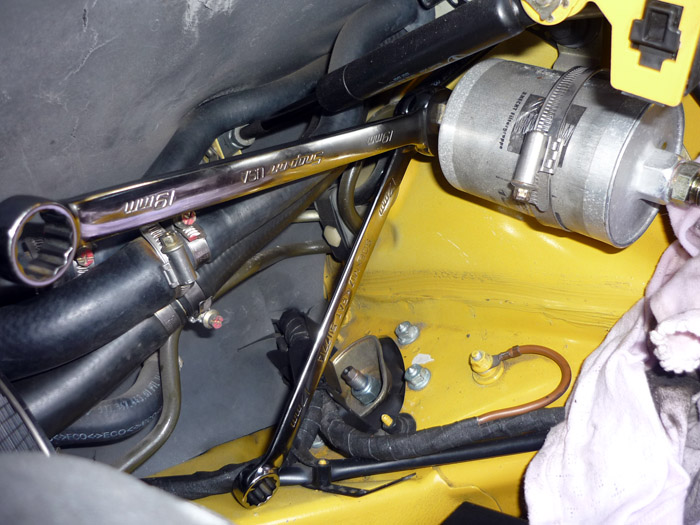
Using both of your 19mm open-end wrenches, remove the outlet line by placing your first wrench on the filter fitting and your second wrench on the fuel line fitting. Holding the first wrench stationary, turn the second wrench (the wrench closest to you) counter-clockwise to remove the fuel line from the filter. Have your shop rags handy to catch the emerging fuel.
Step 3 – Remove fuel inlet line from filter
Place your 19mm open-end wrench on the fuel filter fitting. Then, place your 17mm open-end wrench on the fuel inlet line fitting. Holding the 19mm wrench stationary, turn the 17mm wrench clockwise. (Alternately, you can squeeze the wrenches together to break the connection loose). Have more shops rags available to collect emerging fuel.
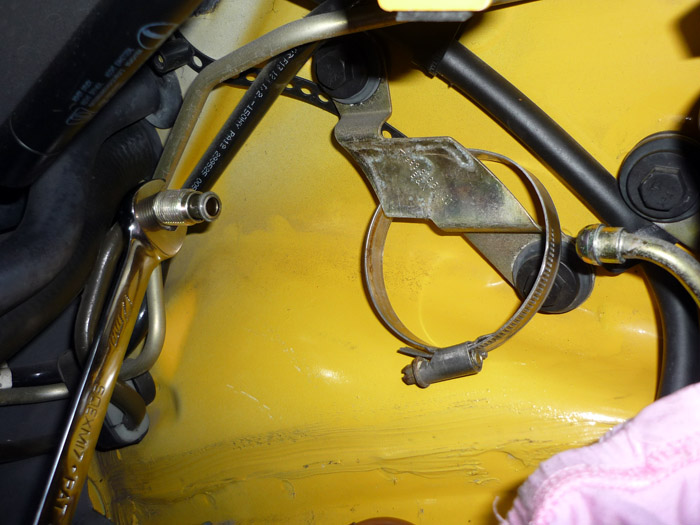
Step 4 – Remove clamp securing the fuel filter
Using your 7mm nut driver or a Phillips screwdriver, remove the worm clamp from the fuel filter. The filter can now be removed from the vehicle.
Step 5 – Install new fuel filter and check for leaks
You can now install the fuel filter in the reverse order of the procedure above. Make sure all fuel lines are securely tightened and the filter is being held securely in place by the worm clamp. Once everything is re-installed, start vehicle and check for fuel leaks. Vehicle may crank a bit longer than usual as the filter has to fill up with fuel. If any leaks are detected, shut the car off immediately and check the tightness on all fittings.

Related Discussions
- Fuel Filter: Change Based on Time - Rennlist.com
- Fuel Filter Change - Rennlist.com