Porsche 993: How to Wrap Interior in Carbon Fiber Foil
Do you want to refresh the interior of your Porsche 993? With the use of carbon fiber wrapping vinyl, you can get an exclusive look in a few easy steps. Follow the guide below to find out how.
This article applies to the Porsche 993 (1993-1998).
To wrap exterior car parts or an entire vehicle in vinyl is growing in popularity. There are many different colors and textures of vinyl to choose from, but you probably spend most of the time with your car behind the wheel, so why not wrap the interior? One way to easily get an exclusive look for your interior is to use carbon fiber vinyl wrap. Real race cars usually have a lot of pure carbon fiber parts, both externally and internally, for weight reasons. You could, of course, buy the real thing (e.g. real carbon fiber parts for your car), but they are very expensive. A cost-effective way to update your interior is to use vinyl instead.

Materials Needed
- Carbon fiber wrap, such as 3M or Neffy
- 3M Super 77 adhesive (spray glue)
- Heat gun or hair dryer (optional)
- Masking tape (optional)
- Exacto knife
- Tools to remove the interior part you intend to wrap (screwdriver and hex driver)
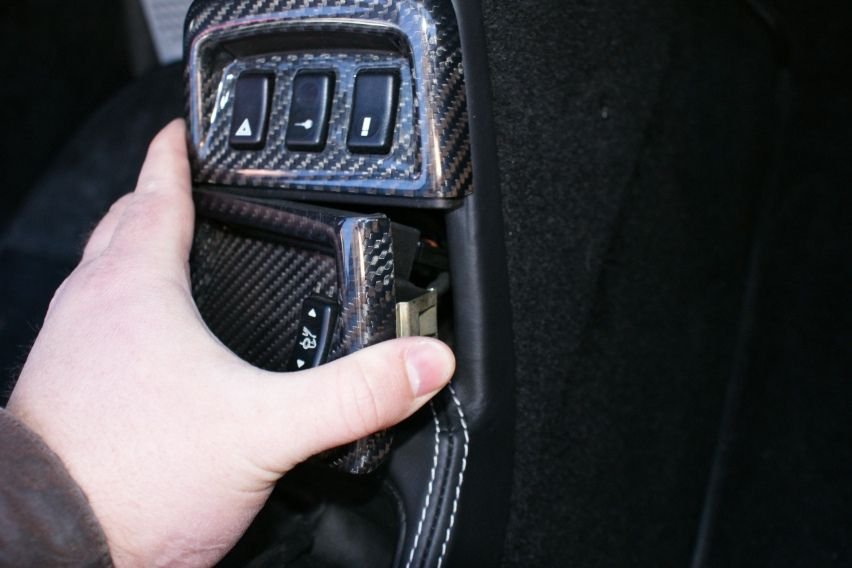
Step 1 – Remove the part you want to wrap
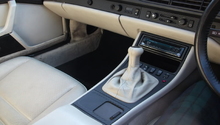
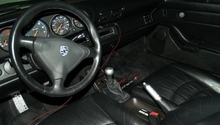
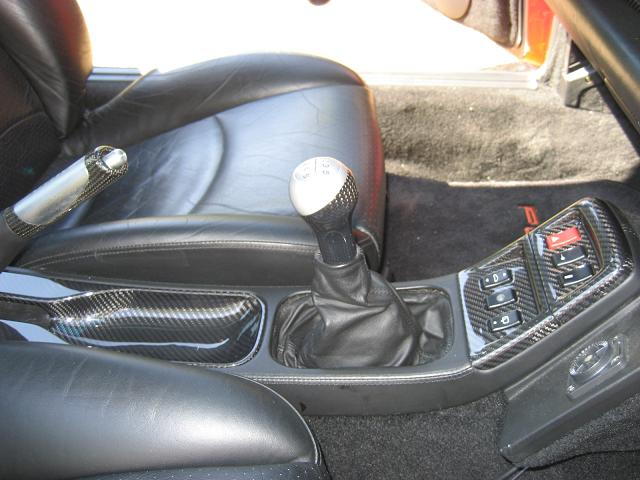
Most parts of the interior are relatively easy to remove with a screwdriver and some hex bits. If, for example, you want to wrap the door handles in carbon fiber, you first need to remove the door sides. Another possibility is to wrap the center console of your car. Included in the Related Discussions section below are some good descriptions about how to remove a lot of interior parts.
Step 2 – Apply carbon fiber vinyl
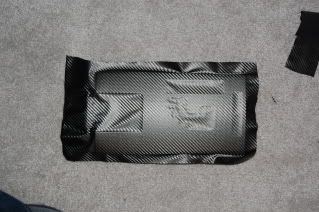
Lay out the pieces that you want to wrap on some carbon fiber vinyl. Cut around each piece, but make sure that you have plenty of vinyl around it. You don’t want to find out later that there is not enough vinyl to fit the piece. Joining two pieces of vinyl is tricky, so be sure to avoid that.
Put the pieces on some plastic film and spray one of the pieces thoroughly with the adhesive spray (3M Super 77); then, spray it one more time to make sure there is enough adhesive. Apply the wrap on the piece and make sure it is smooth on the front side. Leave the back side for later. Let the piece dry for an hour or two to make sure that the adhesive is dry and the vinyl won’t move.
Step 3 – Trim the wrap to fit each piece
Use an exacto knife to cut out any holes needed. To cut out holes, cut an “x” in the hole. Wherever there are rounded corners you might want to cut several strips in the vinyl to get it tightly around the corner. To get the vinyl around some corners you might have to use some heat from a heat gun or a hair dryer. Just be careful not to overheat or overstretch the vinyl since that can make the vinyl loosen up from the surface after several months.

When you have cut the vinyl, apply adhesive on the back side of the piece around the border and tightly wrap the vinyl around the edge.

Step 4 – Re-install the interior parts
When all the parts have dried over-night, you can re-install them in your car. Be careful not to scratch your newly wrapped parts. You might consider applying some masking tape on surfaces (on the vinyl) that are located in tight locations while installing and then simply remove the tape to enjoy the result.
Related Discussions and Site
- Carbon Fiber Wrap - Rennlist.com
- Remove Door Sides - Pelicanparts.com
- Remove/Install Interior - Rennlist.com
- Remove/Install Interior - Rennlist.com