Porsche 997: How to Replace Front Shocks
Get all the shocking details! Puns aside, learn how to replace the front shocks on a Porsche 997 with help from this how-to guide.
This article applies to the Porsche 997 (2005-2012).
If you drove around without shocks, your car would be a crazy bouncing mess. Not only would it perform poorly, because the wheels would bounce themselves out of contact with the road constantly, but it would also look ridiculous. If you took out the springs and just used shocks, you'd get decent handling for a few seconds and then terrible handling once the shocks were compressed. The Porsche 997 needs both parts working in perfect harmony for optimum performance, so replacing the front shocks is a worthwhile investment. Learn how to do so here.

Materials Needed
- PB Blaster thread loosener
- Socket set
- Box wrench set
- Pry bar
- Torx bits
- Safe jacking equipment (jack, jack stands, wheel chocks)
- Breaker bar
- Spring compressors
- Tie bar puller (Not a pickle fork)
- Air compressor and air-driven impact wrench (optional)
Step 1 – Safely jack up the car
Be advised that you are not allowed to injure your car or yourself. If we find out you've done either, we'll be intensely annoyed with you, especially if you've injured your car. Take it easy and be safe. Let the car settle onto the jack stands slowly. A baby should be able to sleep peacefully in your car while you put it on jack stands.
(Related Article - How to Jack Up Your 997 - Rennlist.com)
Step 2 – Loosen the top strut nut and strut mounts
First, the strut nut. You'll need a socket and a breaker bar for this step. This puppy is going to be hard to move if we leave it until the shock is off of the car, so let's go on and crack it while it's still attached. Use your Torx bits to gain access to the tops of your front shocks inside your front trunk (or frunk). Give the shock top nut a generous blast of PB Blaster, being careful not to over-spray it into your carpet. Let it sit for a minute or two to let the PB blaster work its magic, then loosen. You won't be able to remove it, just loosen it. You should feel the strut itself turn once it's loose.

Step 3 – Remove the front wheels
This guide assumes you know how to remove the wheels. Put them somewhere out of the way, but on their sides so they don't roll down the driveway. If they roll away and go crashing through your across-the-street neighbor's front windows, that'll be bad. They could get scratched!
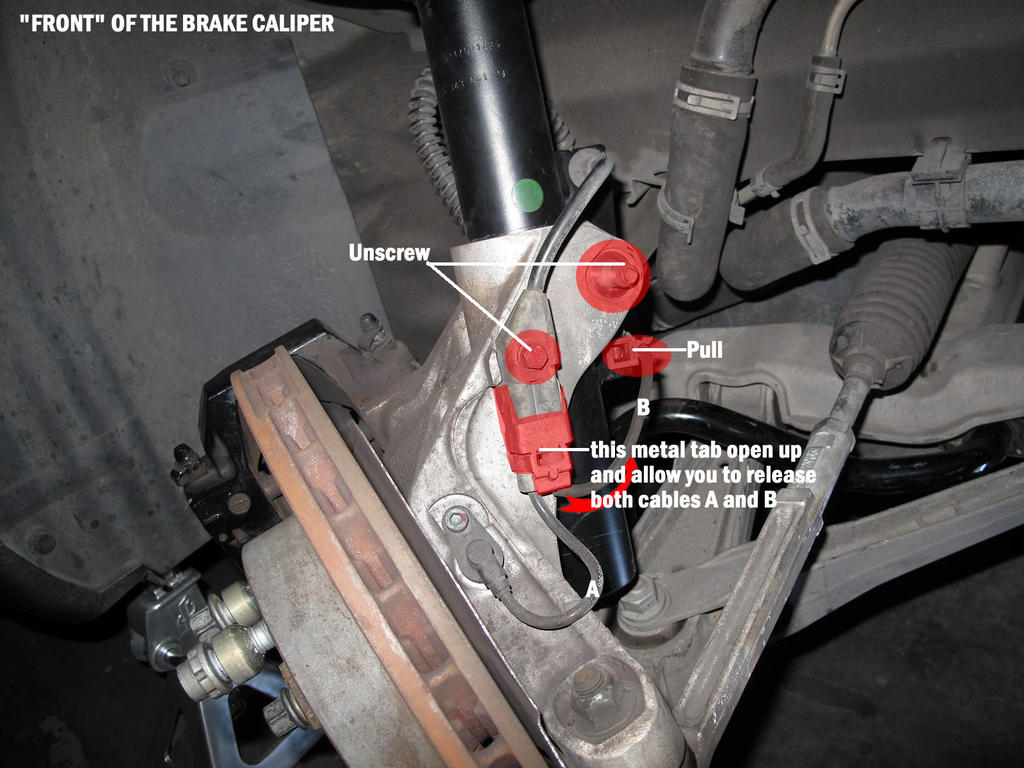
Step 4 – Detach brake caliper
You'll need to get your brake caliper out of the way so you can move your hub carrier assembly (also known as a knuckle). It has two bolts and some electrical cables going to it. All of these need to be removed. Once removed, you'll have to find a way to support it without it dangling on its hydraulic housing. Sometimes, a plastic bucket or your tool box works nicely for resting the caliper on.
Here's a great illustration of the bolts involved in getting that caliper free:

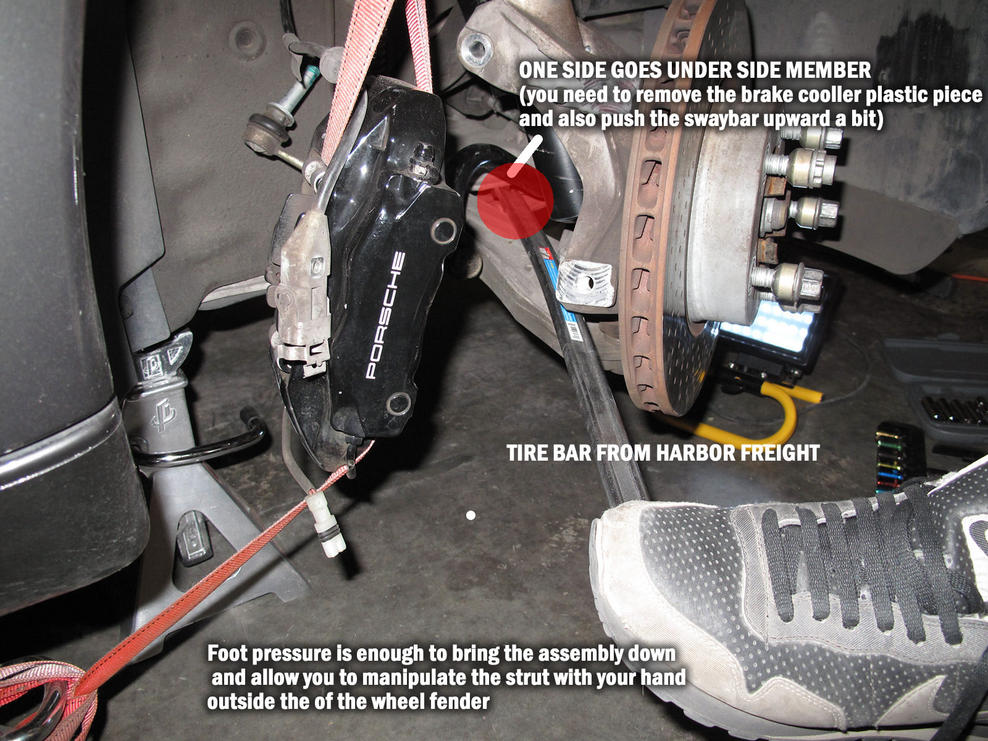
It looks like this owner (Figure 3) threaded his strap through the hole where the shock and support would normally be, so if you're removing your caliper before you get your shock out of the car, this won't work; it's a nice idea anyway, so check it out.

Step 5 – Loosen the rest of the hub carrier (knuckle) bolts
These will all need taking out so that the knuckle can be moved out of the way to give access to the control arm and shock. Note that the owner in Figure 3 above has placed his wheel nuts back on the studs. This serves two purposes. They're less likely to get lost, and the brake rotor is less likely to fall off the hub and crack you on the ankle and/or make a crazy loud racket that will bring the family out to the garage to ask what you've broken this time.
Step 6 – Remove sway bar end links
Your sway bar attaches to the knuckle at the top rear (or inboard rather than "rear," if you like) of said knuckle. You can see the attachment in Figure 4. It needs to be detached so that the knuckle can lean forward, out of the way of the front shock's attachment to the lower control arm. This is a great place to use your tie rod end puller, although you may not need it.
Pro Tip
Whatever you do, don't use a pickle fork to separate your end link because your rubber boot will be destroyed and you'll feel powerful shame.

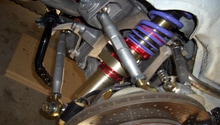
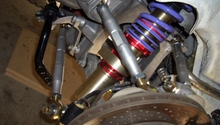
Step 7 – Use spring compressors to compress springs
Warning
Compressed steel springs are accidents waiting to happen, so be very careful with this step. Be as careful as you would be if you knew there was a bowling ball that could possibly roll off a table onto your foot. In both cases, you're dealing with potential energy, and when we use the term "potential" we mean as in there's a potential you could get hurt.
You have to compress the springs in order to get clearance to remove the shocks, so go ahead and compress them. Don't compress them all the way yet, just enough that the compressors are on there nice and tight.

Step 8 – Remove the front shock
This step is going to be a crazy combination of removing the bolt that secures your shock to the lower control arm, removing completely the three shock mount screws in the top, and tightening the spring compressors to give you clearance to get the shock and spring free of the fender and suspension. You will most likely need a pry bar, a lot of patience, and a decent amount of water so you can stay hydrated. You might also need a nap during the process. This is normal. Save your sanity and get some rest.
No sugarcoating here; this step is a real pain in the butt, but you can do it. Just be careful not to ding up your paint or let the pry bar slip and whack you in the shin.
Step 9 – Remove mounting hardware from shock and re-install new shock
While you've got the springs compressed, remove all the mounting hardware and springs and move them to the new shock.
If you've gotten this far, you know everything you need to know about getting your shock free of the car, so just reverse the process and bingo!
- Reassemble the spring, strut and top hat.
- Squeeze the strut back into the knuckle.
- Maneuver the strut assembly back into the wheel well.
- Reconnect the control arms to the knuckle.
- Redo end-links.
- Jack up knuckle and line up strut top mounting bolts with the strut tower holes.
- Fasten the strut to the tower and torque strut top fasteners to 20 ft./lbs. and crank the large strut nut down to approximately 60 ft./lbs.
- Lower the car off the jack stands.
That should do it! Good luck and enjoy the ride on your 997's new shocks.
Related Discussions
- Installed: H&R Sport Springs - Rennlist.com
- 997 H&R vs. Eibach Springs - Rennlist.com
- Shocks for 997 - Rennlist.com