Porsche 993: How to Install a Kill Switch
When you install a kill switch in your vehicle, you are providing an additional, unseen, security system that protects your vehicle from being driven off by would-be thieves. Also known as an electrical cutoff system, a kill switch cuts all power to the main engine, and thus renders the car useless to those who are otherwise unaware that such a system exists within the vehicle.
This article applies to the Porsche 993 (1993-1998).
While there are several benefits to installing a kill switch - or electrical cutoff system - into your car,one of the biggest reasons is to confuse thieves who are trying to steal your vehicle. You see, when the switch is turned off, electricity is effectively cut off to the vehicle, thereby rendering it useless to steal to anyone who doesn’t have a flatbed truck with them.
For owners of a Porsche 993, model years 1993-1998, a worthwhile system is the 6 pole kill switch from Pegasus Auto Racing Supplies; specifically, part number 4430. The reason to go with this particular component is because if your car comes with an alternator, you need to use a switch with a secondary set of contacts to prevent the energized alternator from continuing to provide the engine with power even after the switch is turned off.
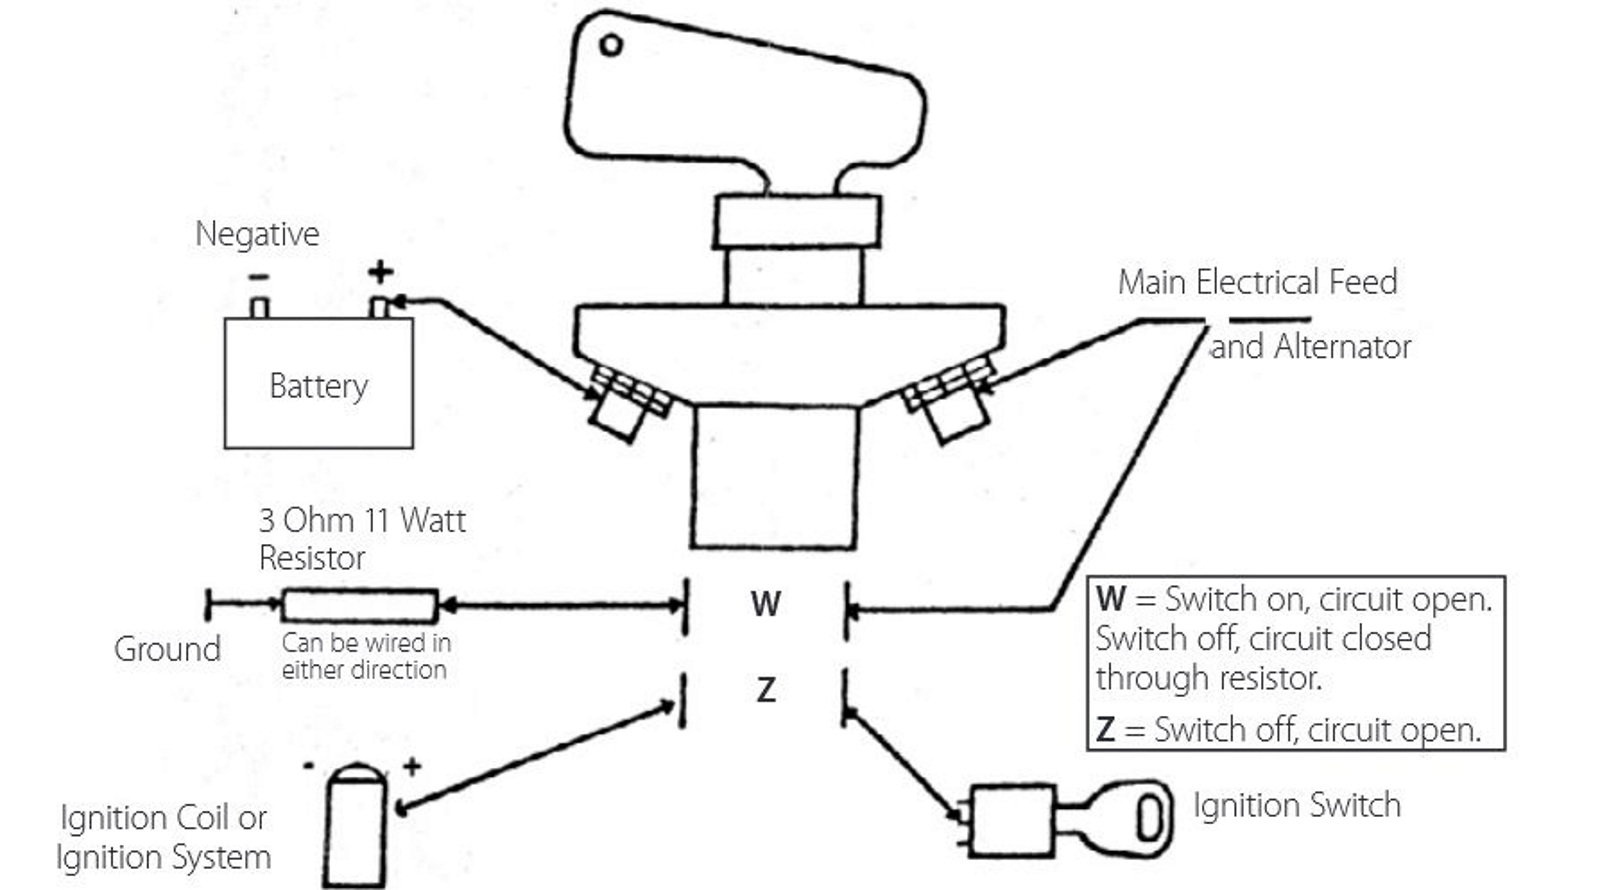
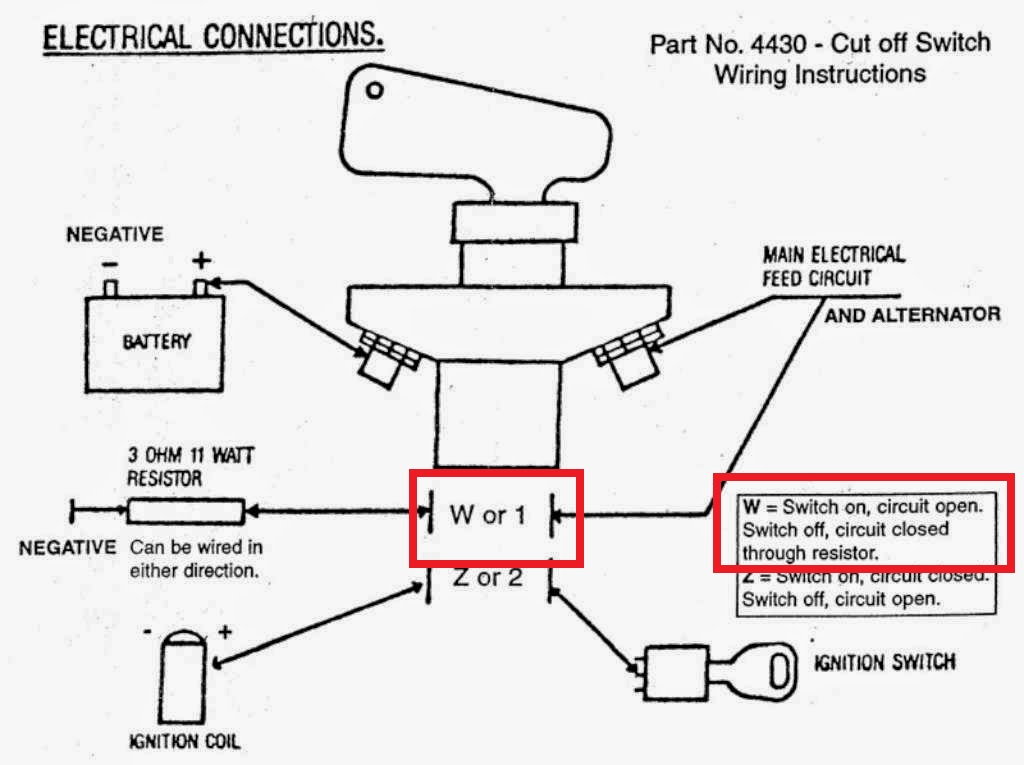
Regarding this particular kill switch, it’s important to note that it has three sets of contacts, which will be referenced in the installation instructions below:
• Mains (Normally Open, switch off means circuit is off): 3/8" stud terminals that break contact to isolate battery when switch is turned off.
• “W” (Normally Closed, switch off means circuit is on): 1/4" spade terminals that connect only when switch is turned off (provides alternator output with a safe, loaded path to ground).
• “Z” (Normally Open, switch off means circuit is off): 1/4" spade terminals that break contact to interrupt power from ignition switch to ignition system when the switch is turned off.
All contacts are isolated from each other and any power going through the main terminals does not get distributed to the ignition system.
Key Information
- DIY Time: 30-60 minutes
- DIY Cost: $75
- Req. Skill Level: Moderate - Requires base knowledge of vehicle's electrical system.
Tools Needed
- Tool 1 - Wire cutters
Here’s how to wire a kill switch into your car:
Step 1 - Turn the car off and disconnect the negative battery cable.
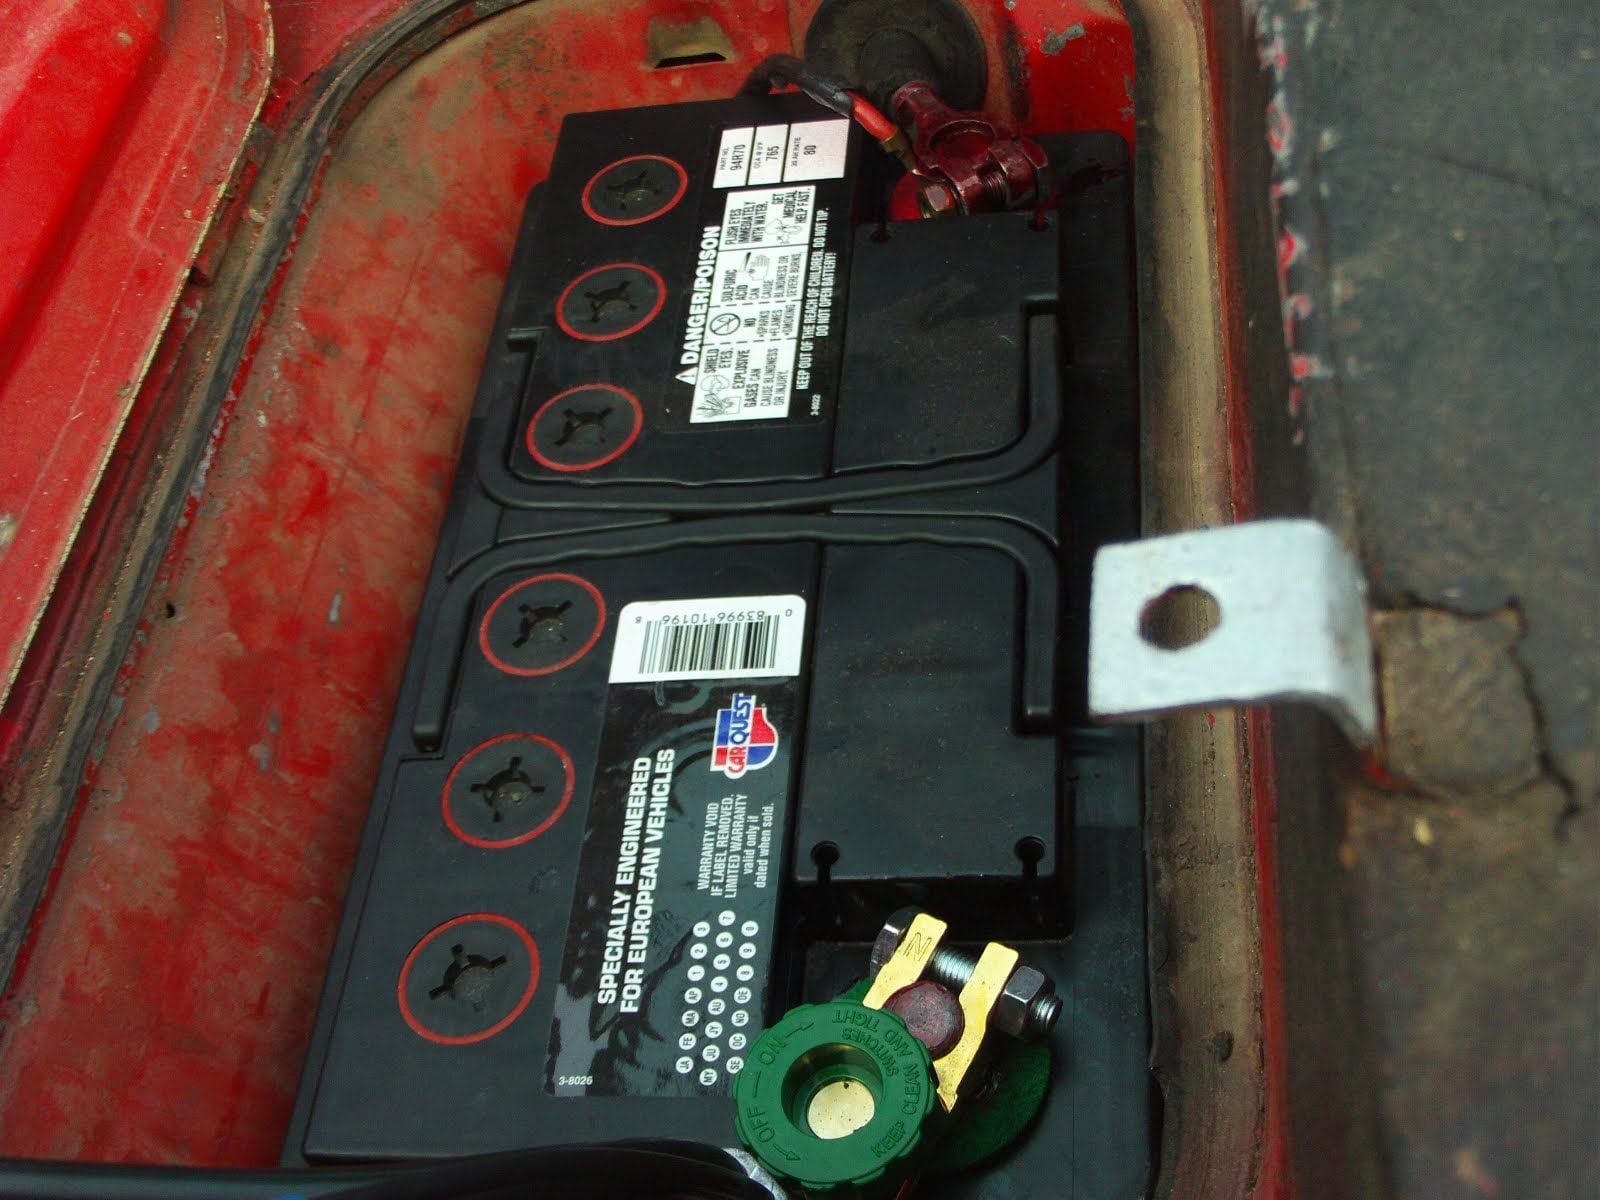
Step 2 - Cut positive battery cable near where switch will be located.
Install 3/8" ring terminals on each cut end.
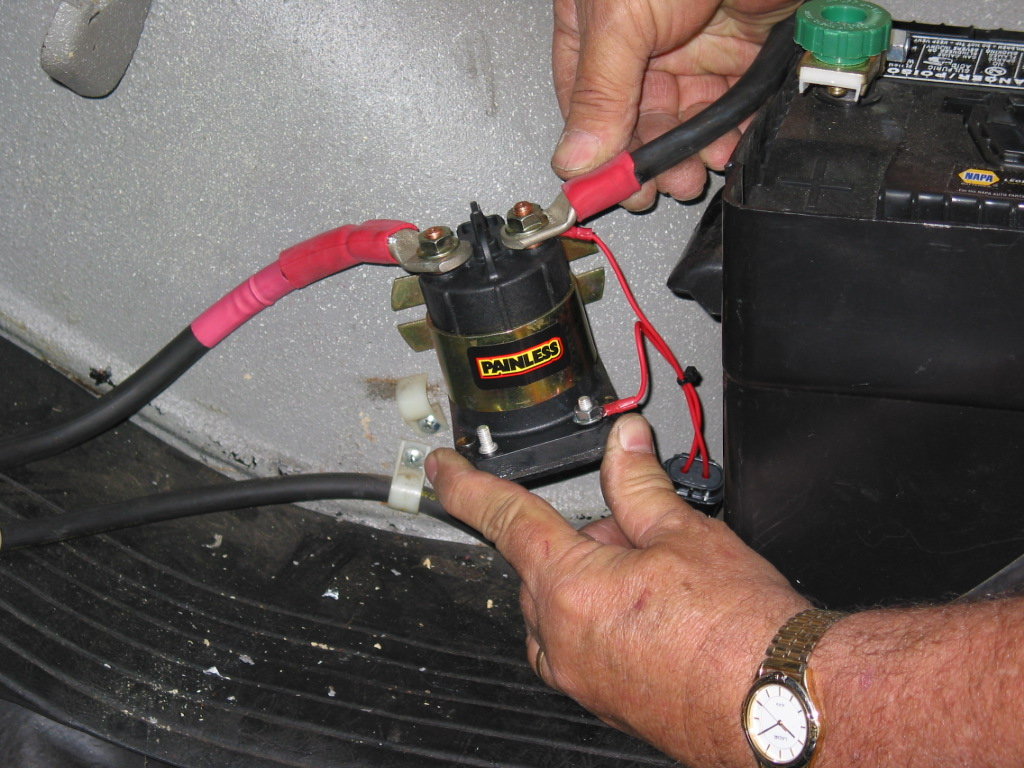
Step 3 - Connect one ring terminal to one main stud terminal on kill switch; connect other ring terminal to other stud.
Pro Tip
Do not worry about polarity while establishing connections.
Step 4 - Locate main power wire from ignition switch to ignition system — cut wire and install female spade terminal on both cut ends.
Wire is located at plug 0 under the fuse box (it’s the smallest red wire and looks like a jumper). Cut and install a 1/4" female spade terminal on each cut end.

Step 5 - Connect one spade terminal on one of the aforementioned "Z" contacts and other spade terminal on other "Z" contact.

Pro Tip
Do not worry about polarity while establishing connections.
Step 6 - Make a simple jumper wire with a 3/8" ring terminal on one end and a 1/4" female spade terminal on the other.
Step 7 - Connect female spade terminal to one of the "W" terminals
Pro Tip
Do not worry about polarity while establishing connections.
Step 8 - Connect ring terminal to 3/8" main stud terminal which does not lead to the battery.
Pro Tip
Polarity is important in this step — if connection is made between ring terminal and stud that leads to battery, the battery will short to the ground, which will drain it and create a fire hazard.
Step 9 - Connect one end of supplied resistor to last remaining "W" terminal.
Connect other end of the resistor to a chassis ground.
Pro Tip
Do not worry about polarity while establishing connections.
Step 10 - Reconnect negative battery cable.
Once everything is reconnected, it is time to test the kill switch. With the switch in the "on" position, start the car and ensure no issues are present. Next, flip the kill switch, if everything was installed correctly, the engine will stop, and all circuits should be off.
Related Discussions
- Kill Switch - Rennlist.com
- 993 Kill Switch with DME relay - Rennlist.com
- 993 Fuse Box - What is this wire? - Rennlist.com