Porsche 993: How to Replace Brake Line
The brake lines are made out of rubber, so you will need to replace them at some point. Learn how to here.
This article applies to the Porsche 993 (1993-1998).
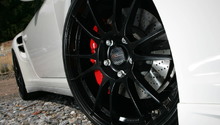
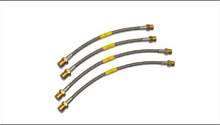
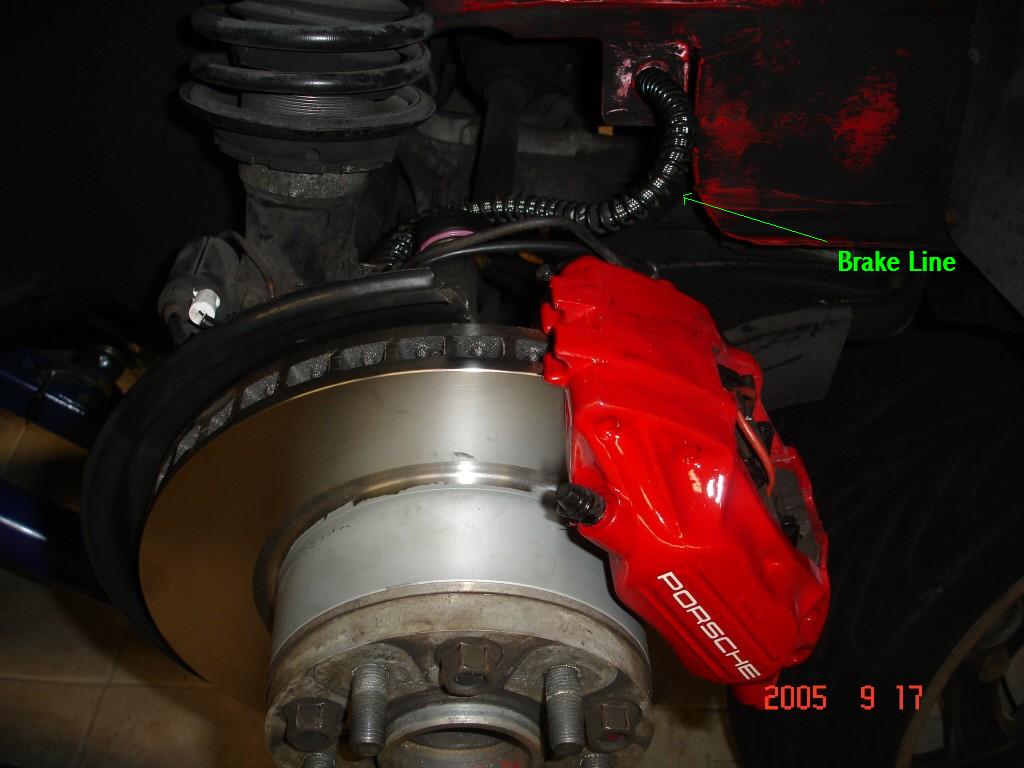
The brake lines are the short rubber lines that connect the hard metal chassis line to the brake caliper on the wheel. These lines are rubber and flexible to allow the wheel to move up and down and still allow the transfer of fluid from the master cylinder to the brake caliper. Over time, the rubber that these lines are made out of becomes brittle and hard. This can cause the line to balloon under braking pressure and can even burst, causing brake failure. To avoid this, it's a good idea to replace all of it and even consider upgrading to stainless steel lines.

Materials Needed
- Flare nut wrench set: 18mm, 17mm, 14mm, 11mm
- Jack
- Jack stands
- Flat head screwdriver
- Drip pan
- Gloves
- Brake bleeder or another willing person
Step 1 – Raise and secure the car
Loosen the lug nuts on the wheels. Find the jacking point of the vehicle and use the jack to elevate the car high enough in the air that the wheels come off the ground. Find a secure point to place the jack stand and place the car on the jack stand to support the weight of the vehicle. It is best to get all four wheels off the ground and supported by jack stands. This will be much more secure and will also aid in performing the repair, especially if you are doing all four brake lines.
Warning
It is not a good idea to leave a car in the air only being supported by the jack. The hydraulic piston can fail which will cause the car to fall.

Pro Tip
Some Porsche 911s sit very low to the ground. It might be necessary to drive them up on a ramp or piece of wood in order to fit a jack underneath them.
Step 2 – Remove wheels
Using the correct lug nut socket, go ahead and remove the wheels. Place the wheels out of the way so that you have enough room to access the brake caliper and get in close to the chassis.

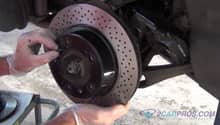
Step 3 – Locate the short rubber line
The easiest way to locate this line is to first locate the brake caliper. Then, look for the brake line that will be connected to it. Once you find it, follow it until you see where it connects to another line. This will usually be at a bracket that is attached to the chassis. Most of the time it is wrapped in what looks like a coil of wire or spring. This is to prevent chaffing on suspension components.
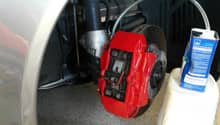
Step 4 – Loosen the end that is connected to the hard metal chassis line
Using your flare nut wrench, loosen the fitting where it attaches to the hard metal line. The reason you want to do this end first is because it will allow the line to rotate and will keep it from twisting when loosening the end connected to the caliper. Once you first get it to turn, you will notice that it is attached to the chassis by a bracket and clip. It will be necessary to remove the clip securing it to the bracket to undo the line all the way. You can use a flat head screwdriver to pry the metal clip up and away from the fitting. It is a good idea to place a drip pan under this area because brake fluid will drip out once the fitting is loosened.

Pro Tip
It is a good idea to soak the fittings in penetrating oil overnight to make the loosening and removal of them a lot easier.
Step 5 – Loosen the caliper end of the brake line
After loosening the chassis end of the line, you can now loosen the end that connects to the brake caliper.
Warning
Be very careful when loosening this end because if you let the brake fluid that drips out sit on the caliper for too long, it will eat away at the coating of the brake caliper. You also want to be very careful not to let brake fluid run down onto the brake pads and rotor.
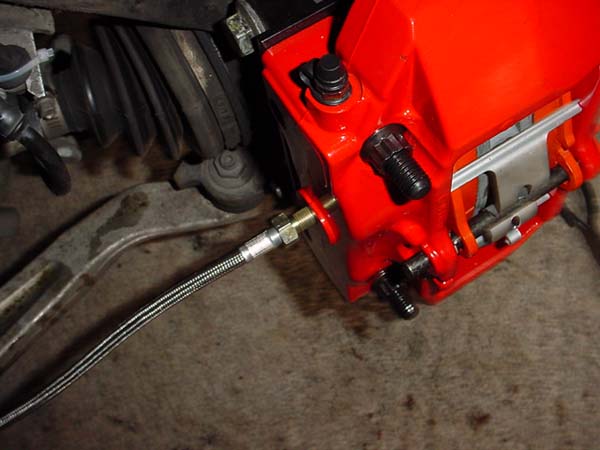
Step 6 – Take new brake line and attach caliper end first
You want to do the caliper end first. As with loosening the old one, it will allow it to connect easier to the hard metal chassis line.
Pro Tip
When connecting the new line, be sure to clean the end of where you are connecting it with a clean cloth or rag. The last thing you want is contaminants inside your brake system.
Step 7 – Connect the other end of the new brake line
Attach the new brake line to the hard metal chassis line. When giving the lines their final tighten, make sure you use two wrenches, one on the end of the new line, and one on the end of the hard metal chassis line. This will keep you from twisting and damaging the hard metal line and will also allow you to get them nice and tight.
Step 8 – Bleed the brakes
After all the lines are connected and tight, it is time to bleed the brake system. This is required because the brake fluid lines have been disconnected, and because of this, air has entered the system. Bleeding the brake system will remove this air and make sure that an adequate quantity of brake fluid is in your brake system.
(Related Article: Porsche 993: How to Replace Your Brake Fluid - Rennlist.com)

Pro Tip
There are a few vacuum bleeders that you can buy to help make this a one-person job. If you don't have one of these, you can always grab a second person to lend a helping hand.
Step 9 – Re-install wheels, lower the car, and go for test drive
Re-install the wheels, use a jack to lower the car, tighten the lug nuts on the wheels, and go for a test drive.
Related Discussion and Sites
- Replace Brake Lines - Rennlist.com
- Brake Line Replacement - Pelicanparts.com
- Bleeding Porsche Brakes - Pelicanparts.com