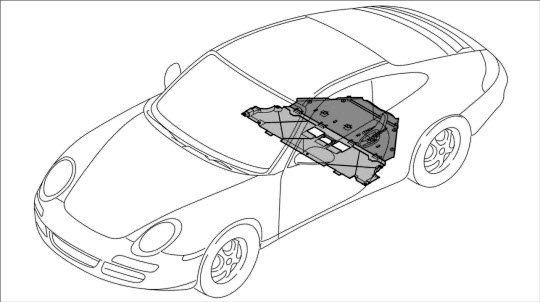
Porsche 997: How to Remove Shifter Mechanism
To have a smoothly functioning shifter is essential for both road use and for sprinted track driving. There is also a possibility that something breaks, making shifting impossible. Continue reading to find out how to remove the shifter mechanism on your own.
This article applies to the Porsche 997 (2005-2012).
Sometimes, the gear shift mechanism needs to be removed for repair or maintenance. The reason could be a snapped shifter cable, or maybe you want to install a short-shift kit to improve the feel and performance of the gear shift. When the original shifter cables are replaced for new ones, you could also experience that the shifting works smoother and all gears engage easily.

Materials Needed
- Jack and jack stands
- Torx T25 bit
- Plastic trim removal tool
- 10mm socket
- Wrench
- 2 flathead screwdrivers
- Lubrication spray
- Locking Bridge (P9619/1) (optional)
- Rubber mallet
Step 1 – Jack up the car and remove under panels
Jack up the car and put it on jack stands. Then, get under the car to remove the two rear under panels using a 10mm socket for the nuts, and a T25 hex bit for the Torx bolts. There are six bolts and four nuts in total.
(Related Article: How to Jack Up Your Porsche 997 - Rennlist.com)
Step 2 – Remove the center console
Next, you need to remove the interior center console of your car.
- Use a plastic trim removal tool, and pop off the shifter surround.
- Use a 10mm socket to undo all of the bolts securing the console to the chassis.
- Pop off any additional interior plastics, then lift up on the center console. This may require a small twisting motion to get it around the e-brake handle.
The full DIY can be seen here.
Step 3 – Detach the shift cables
Detach the shift cables from the ball heads on the control arms coming out from the transmission. Use two flat head screwdrivers right at the arrows to lift them off. Detach the cable sleeves from the brackets. Push the two retaining clips together, and pull the cable sleeves out of the brackets.

Figure 2. Detach shift cables from control arms. 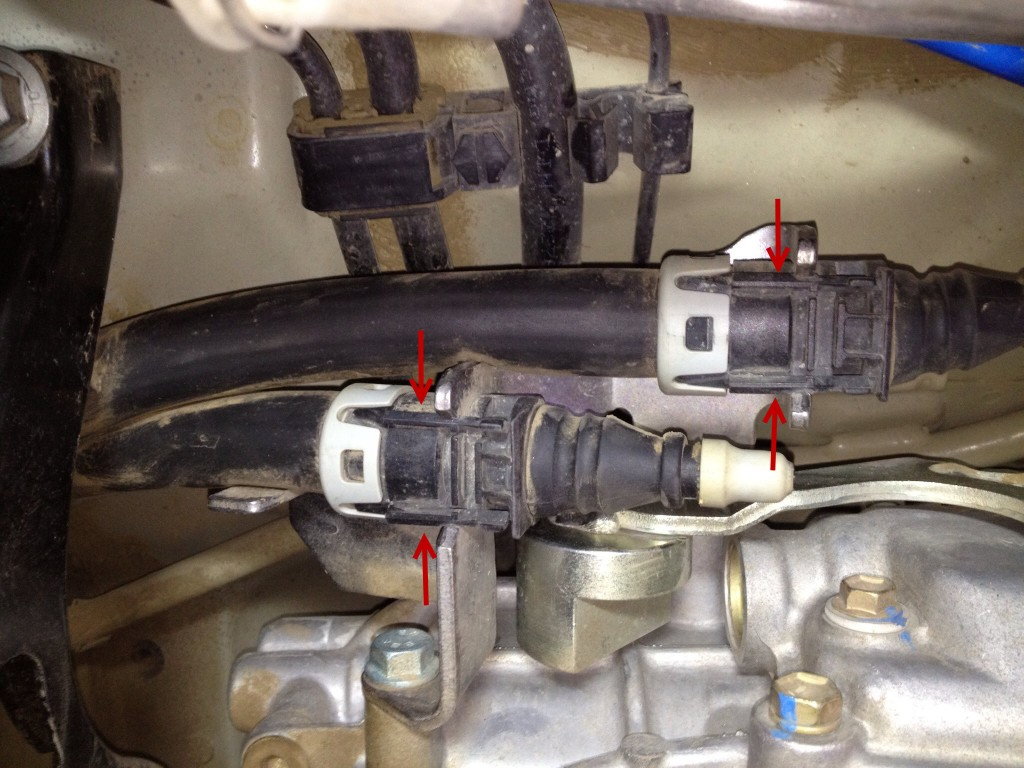
Figure 3. Detach the cable sleeves from the bracket.
Step 4 – Detach the shifter cables inside the car
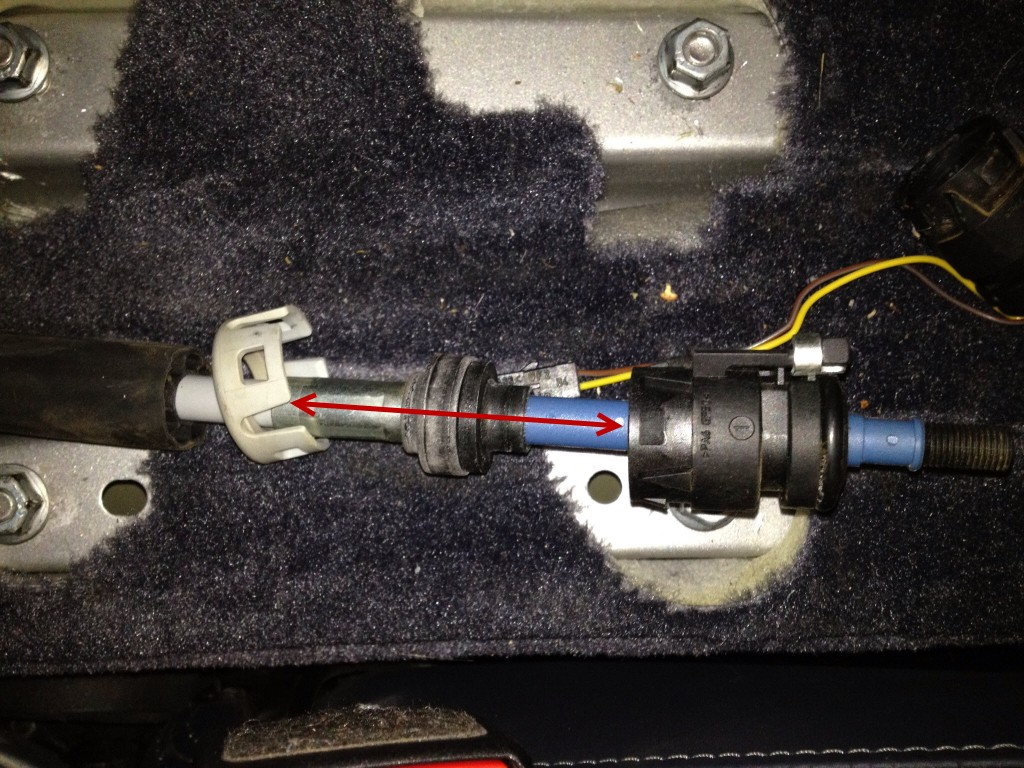
Detach the cables from the gear shifter linkage by pushing to compress the spring, and then turn clockwise to open up the attachment. Then, notice where on the threaded attachment the cable is located (Figure 5) before removing them. This information is needed when reattaching the cables to get them in the same position as before. Also, detach the cable sleeves from the bracket by pressing the retaining clips.

Figure 4. Compress the spring and turn the attachment. 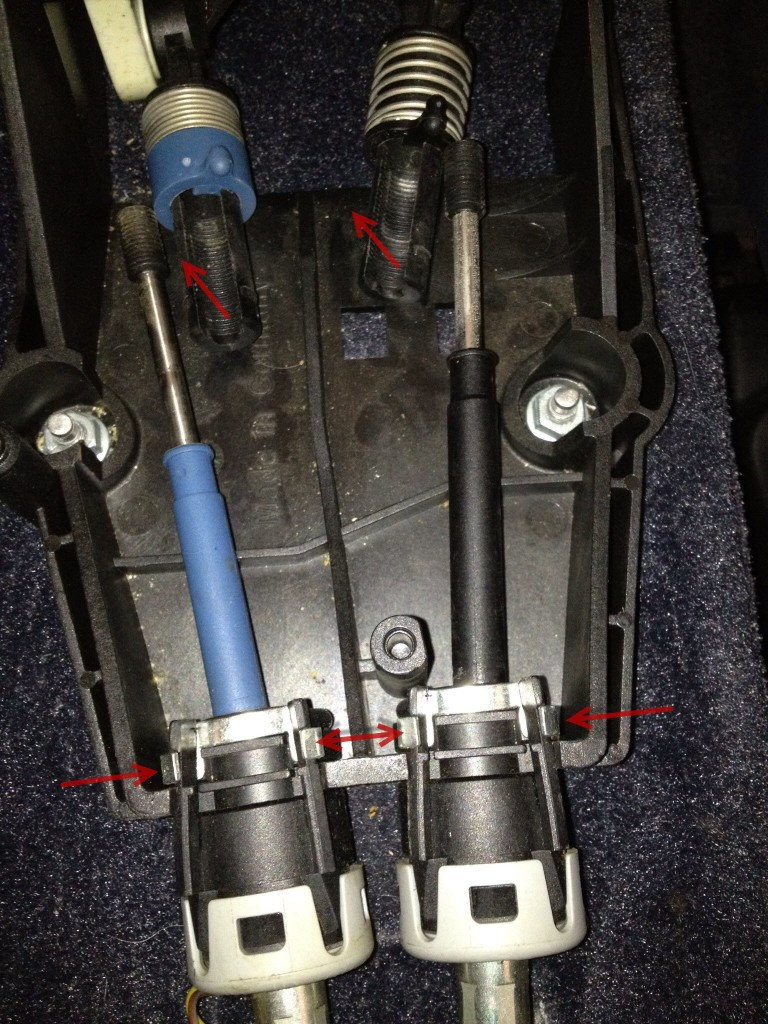
Figure 5. Remember where the cables are located on the threads before detaching the cables. Also, un-clip the cable sleeves from the bracket.
Pro Tip
There is a special Porsche tool to get this adjustment of the cables right without counting the number of threads (Locking Bridge P9619/1 ). However, as long as you remember the position of these cables you don't need this tool.
Step 5 – Unbolt and remove the hand brake
Remove the four nuts (one in each corner) securing the hand brake. When removing the hand brake, press the handle button to relieve tension from the cables. Push the two retaining locks of the cables out of the bracket (Figure 7). Remove the round foam pad, and push the rubber sleeve out/under the car towards the transmission. Use some lubricating spray, and then hit it with something blunt like a rubber mallet.
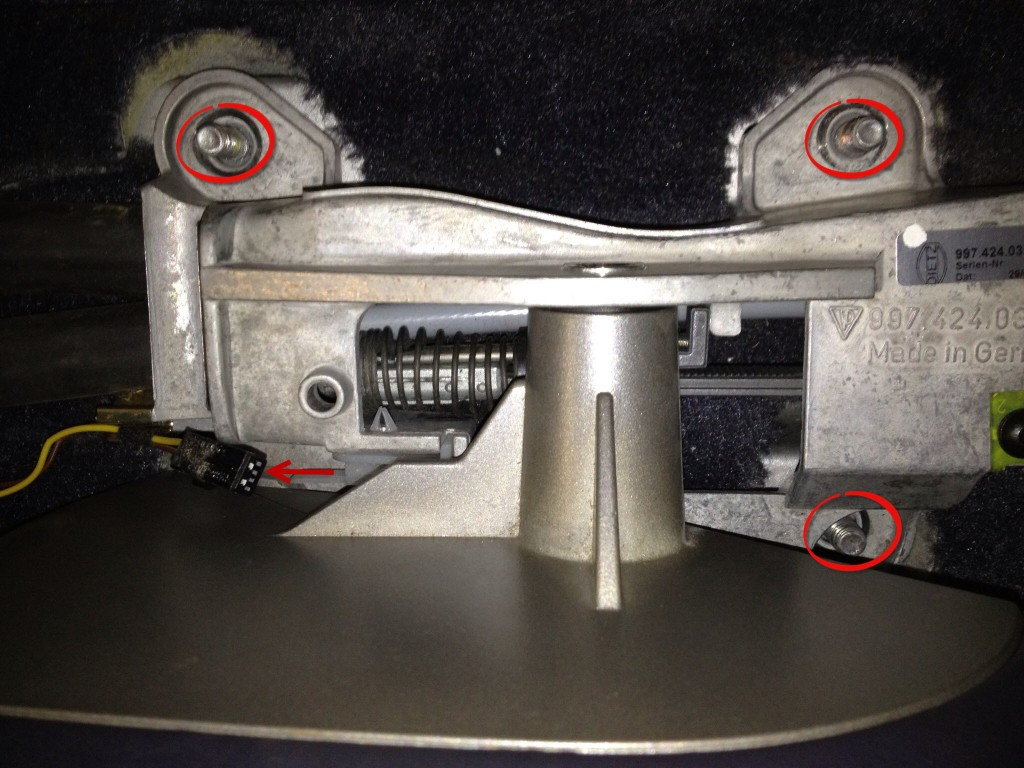
Figure 6. Remove the four nuts securing the hand brake. 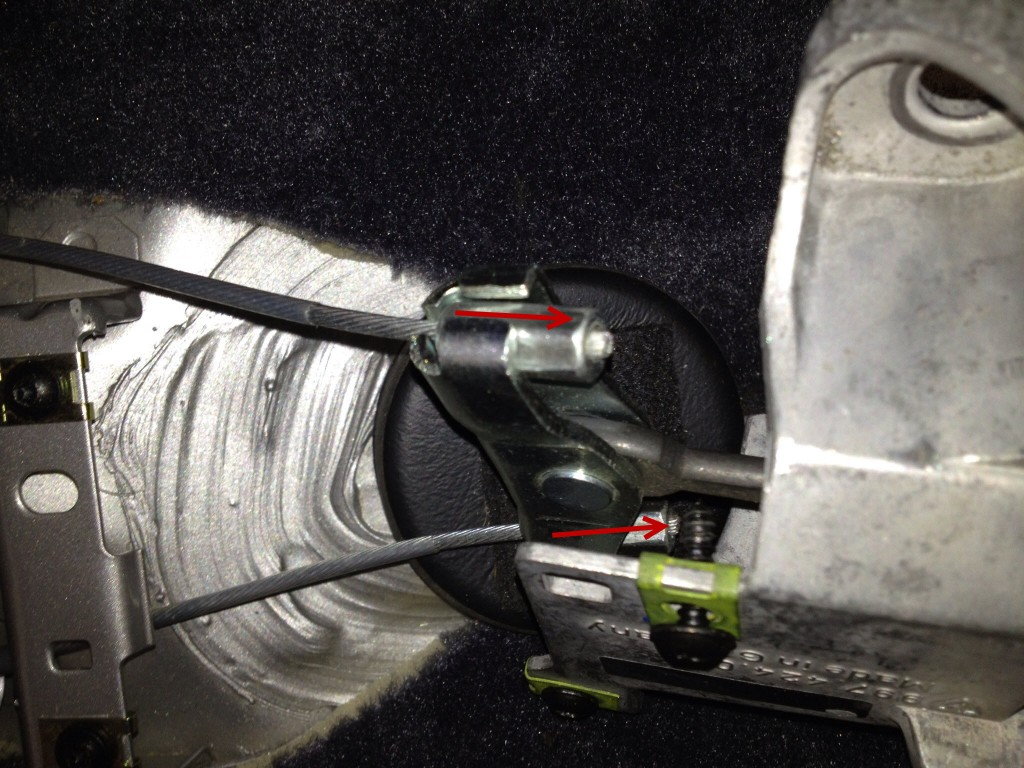
Figure 7. Push the cables out of the retaining bracket. 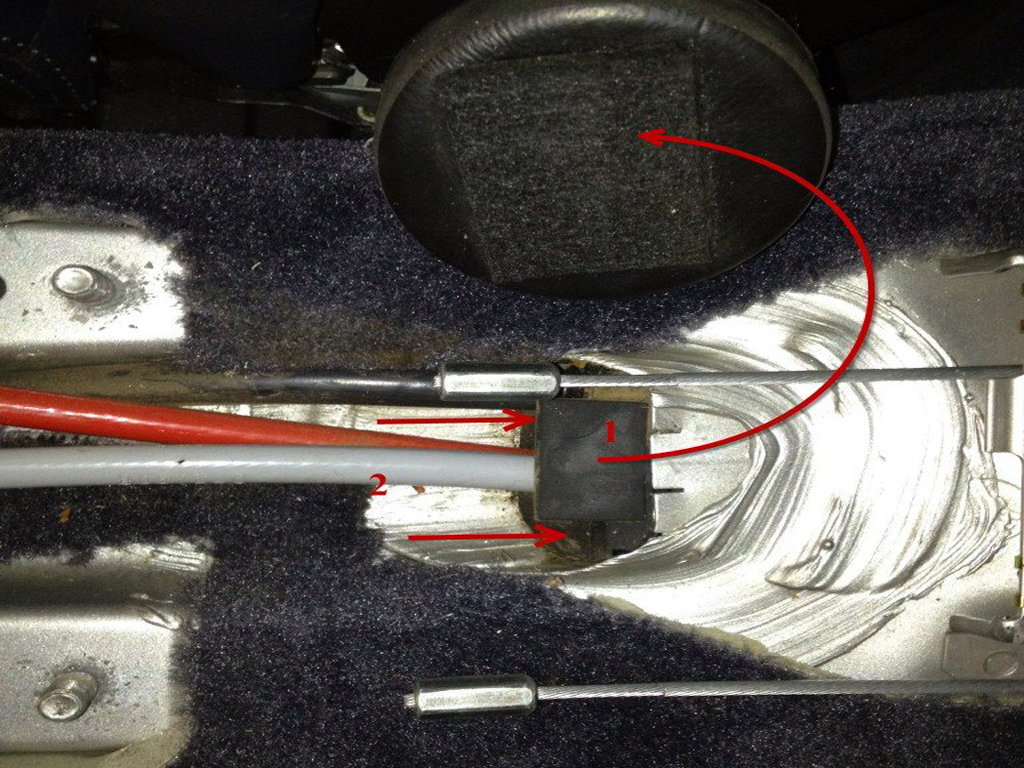
Figure 8. Remove foam pad and push the rubber sleeve out.
Step 6 – Remove the shifter cables
With the rubber sleeve removed, it should be possible to guide the cables out through the floor of the car. If you need to, you can pop the white cap of from the cables to make them thinner.
Step 7 – Diagnose what is wrong
Diagnose what is wrong, and replace any damaged parts that are causing problems. Then, put everything back together again. To do so:
- Refit the caps onto the shifter cables, and reconnect them to the chassis.
- Re-install the hand brake and its sensors.
- Align the shifter cables up, and reattach to the inside of the chassis (note the orientation of the tension springs).
- Redo the undercarriage shields.
- Lower the car down.
Related Discussions
- Shift Cable Diagnostics and Replacement - Rennlist.com
- Notchy Shifter - Rennlist.com