Porsche: How to Protect Your Paint
Achieving showroom finish results is easy. Simply clean and detail your car using these simple instructions.
This article applies to the Porsche 993 (1993-1998), Porsche 997 (2005-2012), and Porsche 928 (1978-1995).
The Porsche 993 is a well-crafted vehicle that boasts beautifully shaped teardrop mirrors, an attractive bodyshell architecture that is reminiscent of the 964 and earlier 911 models, as well as a smooth front and rear bumper design. While you may be tempted to hire a detailing professional to ensure your car's paint retains its exquisite showroom finish, you may want to reconsider. This guide will demonstrate the simple steps you need to take to protect your car's paint. And don't worry, you'll only need to use a few, inexpensively priced materials to complete the job from home.
Materials Needed
- Hose connected to a working faucet
- Clay bar
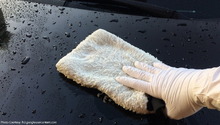
- Microfiber cloth
- Paint sealant
- Terry cloth and soft towel
- Paint sealant
- Wax
Step 1 - Determine the quality of your car's paint
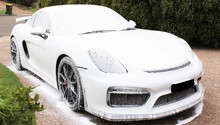
Using a hose, wet the exterior of your vehicle with clear water (do not create a soapy solution in a bucket for this test). Check if tight, uniform beads appear on the surface of your car after it is hosed down. If they do, your car's paint is in good shape. If, however, no beads form, or poorly shaped beads are formed, your car's paint is not up to par and could benefit from an application of paint sealant and wax. Rinse your car entirely before moving on to Step 2.

Pro Tip
Your car can still benefit from a small amount of sealant and wax, even if the paint is in good condition.
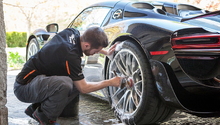
Step 2 - Remove stubborn dirt and debris from the surface of your car
Clean the surface of your car using a clay bar. The clay bar is designed to automatically pick up stubborn dirt and debris without your needing to exert much pressure or force. Simply wet the panel and glide the bar over the entire surface of your car, moving section by section, until the entire vehicle is free of dirt and debris. Go over the surface of your car once more using a clean microfiber cloth to remove any residue left behind by the clay bar.

Pro Tip
Make sure that the panel is always lubricated. Clay bar should not take a noticeable amount of pressure to move across the panel.
Step 3 - Apply a premium paint sealant for optimum paint protection
Rub a generous amount of paint sealant into the paint using a clean terry cloth. Spray the desired area, and then, using a front-to-back motion for front panels, and a side-to-side motion for side panels, seal the entire surface of your car section by section.

Pro Tip
You can purchase a bottle of paint sealant for as little as $16 to $20 at auto parts stores and online retailers.
Step 4 - Wax your car
Buff the wax into your car's paint using a soft, clean, lint-free towel. The waxed panel should exhibit a hazy finish. From here, take a clean cloth and rub the wax off, continuing until you waxed your car's entire surface to a showroom finish. In this instance, we are using the wax as a "topper" product, to offer additional gloss and depth the to the panel.

Pro Tip
If this is your first time applying wax to your vehicle, test out a small area first, looking for signs of discoloration and surface damage.
Related Discussions
- Finished Detail on 993 - Rennlist
- Detailing Thread - Rennlist
- Pro Detailer Thread - Rennlist