Porsche 911 GT3 RS Completely Disassembled for Detail Job
Today's detail jobs are more extreme than ever, as is clearly on display with Posh Detailing's work on one Porsche 911 GT3 RS.


Disassembly Required
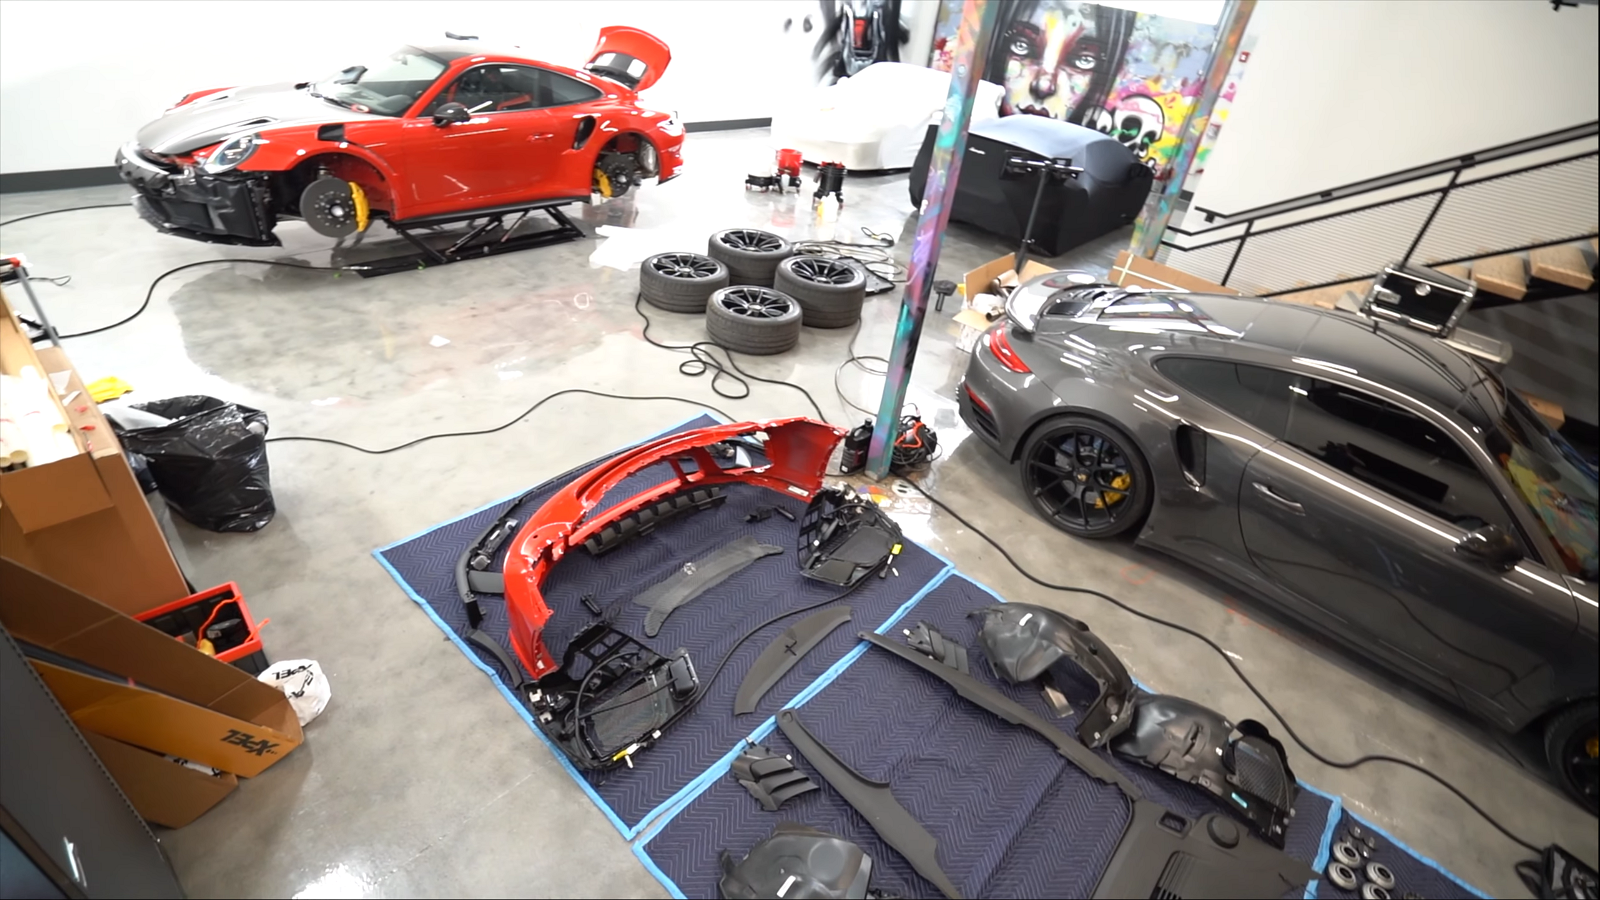
Chances are, you've probably never disassembled your car while doing a detail job. But these days, detailers (and their customers) are going to some serious extremes to make their rides look their best. Posh Detailing took things just a bit further than usual with this particular 911 GT3 RS, however. While the Porsche received the typical detail job and paint protection film, Posh went a little further than most to ensure total coverage.
Total Coverage
It might seem somewhat crazy, but there is a method to this madness. Apparently, Posh wanted to remove multiple exterior parts from this Porsche to gain access to some areas they wouldn't be able to reach otherwise. This way, they're applying protection film across the entire body, not just most of it.
>>Join the conversation about the detailed disassembly of this GT3 RS right in the Rennlist Forum!
Wingless
And if you're thinking about removing some of your own GT3 RS's body parts, this video also provides some nifty instructions on how to do it. Starting with the car's giant wing. They begin by removing the wing's end plates, which only requires the removal of some T25 Torx screws. Then, they use a hard squeegee to separate the plates, which are held in place with some double-sided tape. The wing itself is held in place with a handful of T30 screws.
>>Join the conversation about the detailed disassembly of this GT3 RS right in the Rennlist Forum!
Simple Removal
With the wing removed, it's time to move on to the taillights. These are held in place with nothing more than a pair of T25 bits. Once you remove those, simply unplug the harness. Moving to the side scoops, you can simply use a squeegee to remove them as well. You just might want to use a little masking tape to prevent it from scratching the paint in the process.
>>Join the conversation about the detailed disassembly of this GT3 RS right in the Rennlist Forum!
Up Front
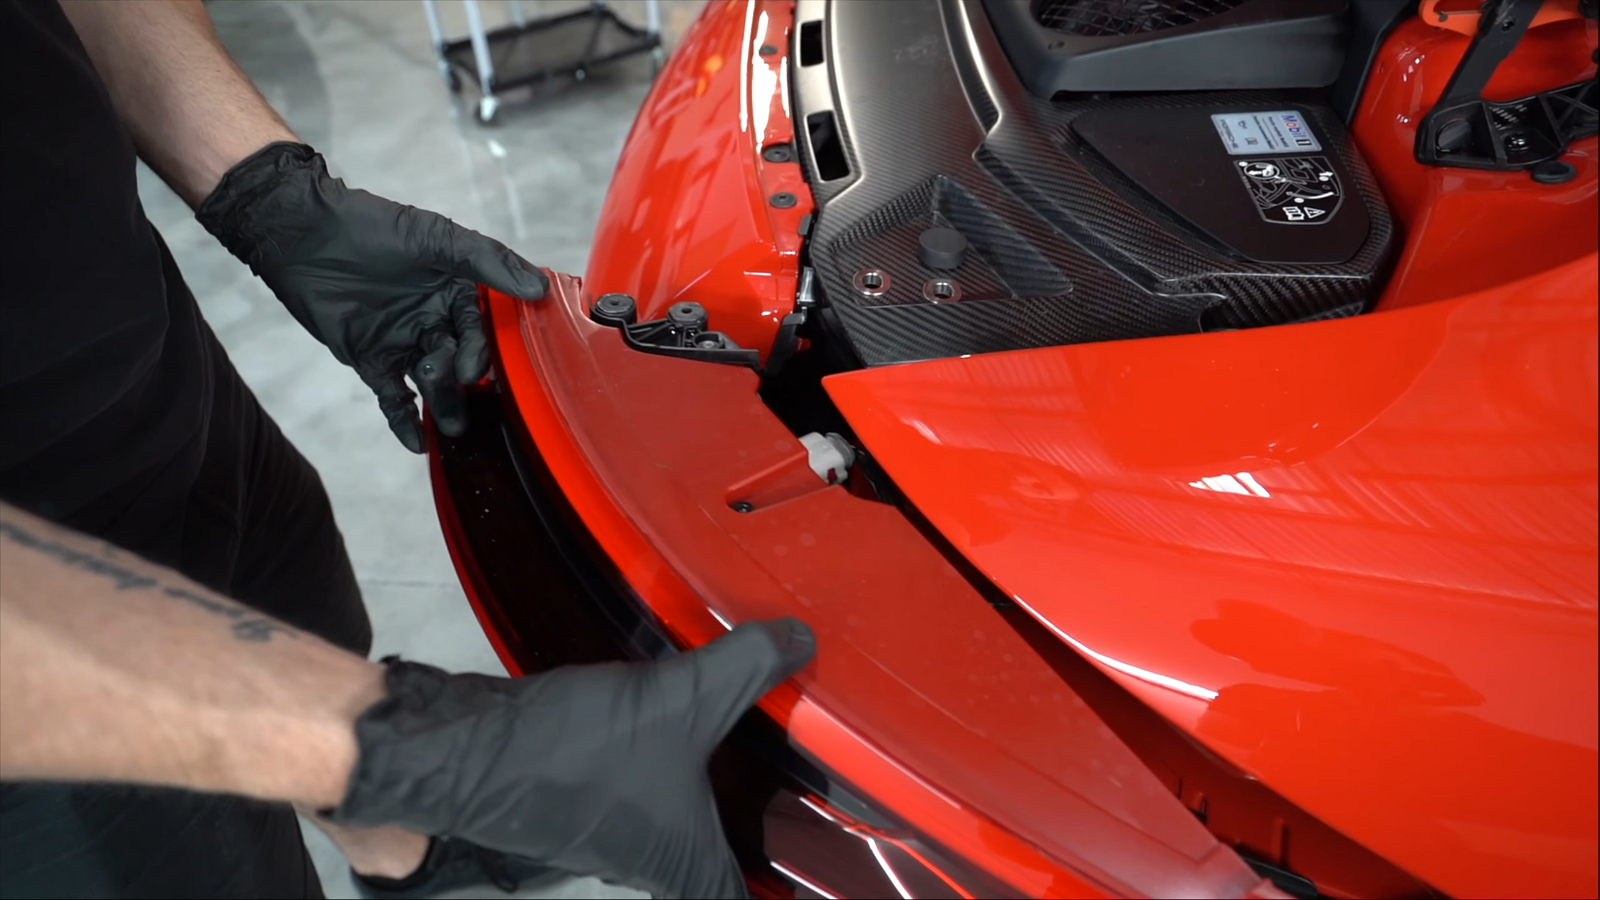
Posh then moves on to the black piece on top of the engine cover/trunk, which is held in place with seven T25 bits. They also remove the black vent (held in place by 11 T25 screws) before moving on to the front of the Porsche. Up there, you start by removing all the underhood trim. Next, you'll remove the front lip by removing the 16 T27 bolts that hold it in place.
>>Join the conversation about the detailed disassembly of this GT3 RS right in the Rennlist Forum!
Gimme No Lip
With the screws removed, the front lip and side pieces simply snap off. The side markers can come out by hand as well. The mesh for the fender louvers is held in place by three T20 screws. Once these parts are out, you can remove the fender liners. Underneath the front fender liner, you'll find a couple of T25 screws for the side louvers.
>>Join the conversation about the detailed disassembly of this GT3 RS right in the Rennlist Forum!
Grab a Buddy
Next, the headlight washers come out using a pick tool. Now, the bumper can be removed. Start by removing the three T30 screws up top. Then use a pick tool to separate the bumper from the fender where the sliders connect the two. Now, you're ready to remove the bumper, which is much easier to do with a friend helping you.
>>Join the conversation about the detailed disassembly of this GT3 RS right in the Rennlist Forum!
Finishing Touches
When you pull the bumper off, you'll also have to disconnect a couple of harnesses and a rubber hose for the headlight washers. Next, remove the headlights using a 10mm ratcheting wrench to undo the pair of nuts holding them in place, then disconnect the harness. Now you can gain access to the fender louvers, which are held in place by T10 and T15 Torx screws.
>>Join the conversation about the detailed disassembly of this GT3 RS right in the Rennlist Forum!
Full Coverage
At this point, the car is taken apart enough to do a proper detail job. "You can see how much more coverage you can get when you disassemble everything like this," our host says. "These edges would normally get pretty beat up over time. This way, we can wrap them and everything's covered." It seems like a lot of work, but if it saves our precious Porsche's paint, we suppose it's worth it!
>>Join the conversation about the detailed disassembly of this GT3 RS right in the Rennlist Forum!
For help with maintenance and repair projects, please visit our how-to section this forum.