Porsche 993: How to Change Transmission Fluid
Many drivers tend to make a huge mistake and ignore the transmission fluid in their vehicles. This mistake can be costly in the Porsche 993 since it is an older vehicle.
This article applies to the Porsche 993 (1993-1998).
The transmission is a critical component of your Porsche 993, and since it consists of gears grinding at all times, lubrication is a must. Your transmission fluid can get old after a while and need changing. If you feel the gears grind or make any abnormal noise when it's shifting, you may need to replace your transmission fluid. Since the Porsche 993 is getting to be an old car, a lot of enthusiasts recommend you replace the tranny oil anyways and save yourself the trouble.
Materials Needed
- Flat head screwdriver
- 10 mm hex socket
- Rachet
- Torque wrench
- Breaker bar
- Jack stands
- Shop rags
- Creeper
- 4 liters transmission fluid
- Oil drain pan
- Oil transfer pump
- Container for used fluid
- Gloves
- Protective eye wear
Step 1 – Lift the car
With tools and supplies at hand, lift the car. Be sure to use the proper jacking points on your Porsche 993. When the car is lifted, secure it on jack stands.

(Related Article: How to Jack Up Your Porsche - Rennlist.com)
Pro Tip
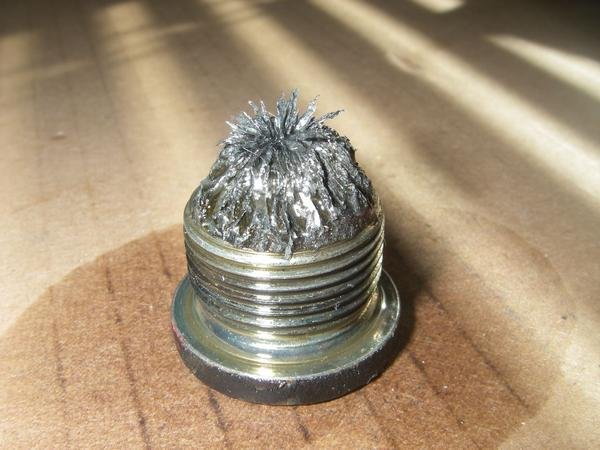
If the car is not already fitted with one, buy a drain plug with an integral magnet to collect metal shavings.
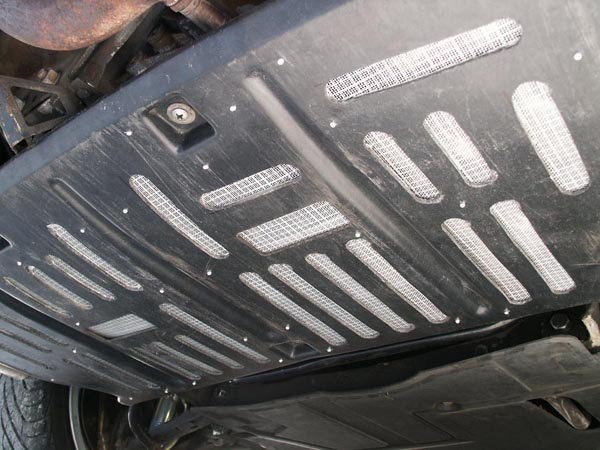
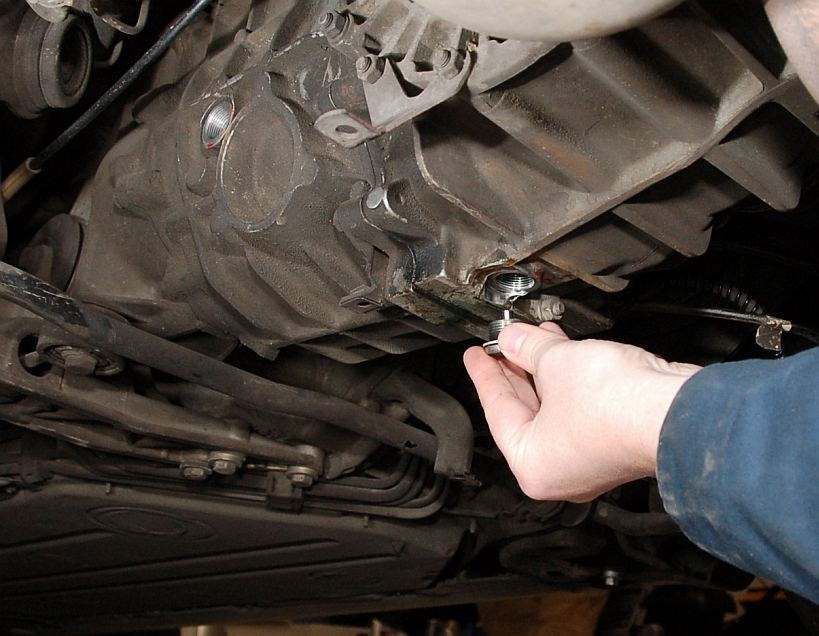
Step 2 – Use creeper to get underneath the car
With the car leveled and secured, put on the gloves and protective eyewear, then use the creeper to get under the car without bumping any of the jack stands. Remove the protective engine and gearbox undertray. Next, locate the transmission fluid fill plug and the drain plug. Use the 10mm hex socket and ratchet to loosen, but not yet fully remove, the fill plug. Some 993s will have a crush washer on the fill plug, which requires more effort to remove. You may need the breaker bar at this point.
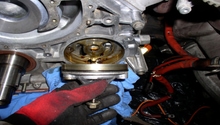
Step 3 – Remove drain plug
Making sure the drain pan is in place under the vehicle, use the 10mm hex socket and ratchet to remove the drain plug, then remove the fill plug allowing the fluid to drain freely. While the fluid is draining, clean the drain plug and install a new seal ring on it. This is a good time to inspect the fluid as you transfer it from the drain pan into a suitable container for disposal at an auto parts store. If it looks really dirty and brown, make a note to change the fluid sooner next time and possibly use a better quality fluid.
Step 4 – Install new drain plug
If the car is not equipped with one, install a new drain plug with an integral magnet (which will collect any shavings for you to see the next time you perform this task), using the 10 mm hex socket on a torque wrench set to 30 pounds.
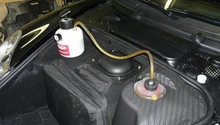
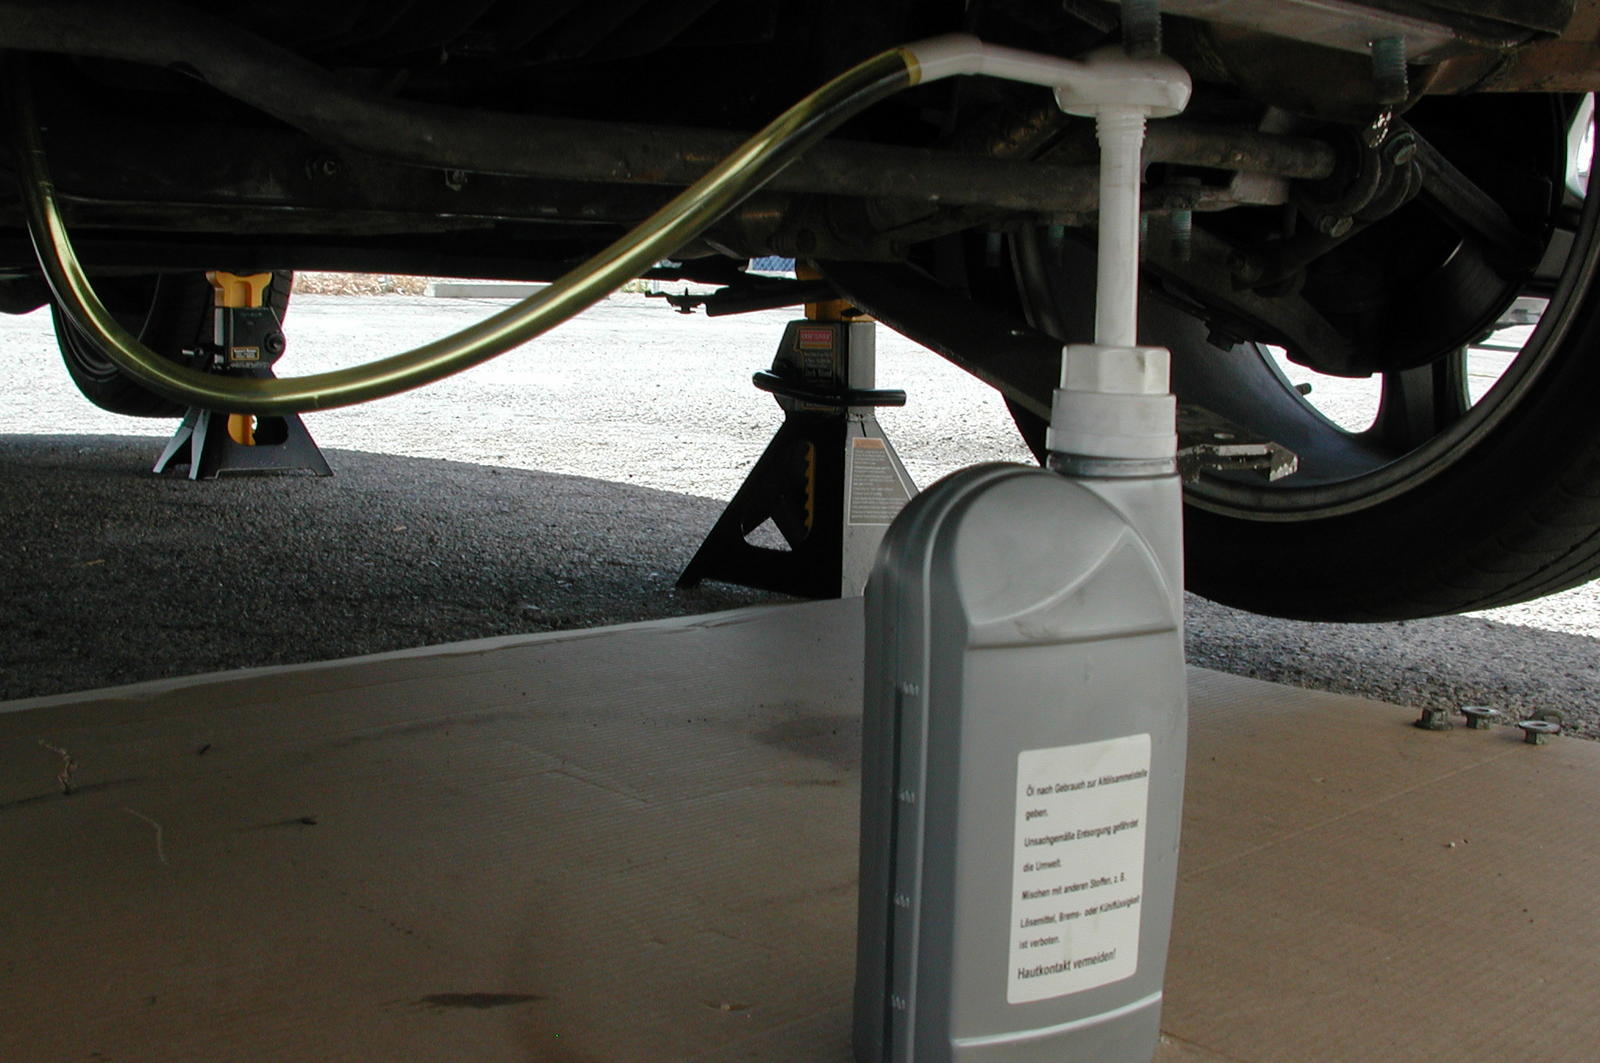
Step 5 – Add new fluid
Use the oil transfer pump to add fresh fluid. Slow the pump when you reach approximately 3.5 liters (the reservoir capacity is 3.6 liters). You can pump until a slight overflow occurs. Use a shop rag to wipe up the excess and then re-install the fill plug.
Step 6 – Replace protective undertray
Replace the engine and gearbox undertray, lower the car and go for a short test drive. Inspect under the car for any leaks.
Related Discussion and Site
- Transmission Fluid Check - Rennlist.com
- Transmission Fluid - Performance2and4.co.uk