Porsche 997: How to Change Manual Transmission Fluid
When was the last time your 997's transmission fluid was replaced? You might want to replace it more frequently than specified in the factory recommendations, especially if you are attending track days. Continue reading to find out how to complete this task yourself.
This article applies to the Porsche 997 (2005-2012).
Neglecting to replace fluids in your Porsche 997 can prove to be costly in the long run. The transmission, i.e. gearbox and differential, is responsible for bringing the power of the engine to the rear wheels. This means that quite a lot of heat builds up in the transmission during street use and even more so during track use. The heat eventually breaks down the transmission fluid. This means that the lubricating ability of the fluid diminishes and the wear of the transmission increases. To prevent this process, the transmission fluid should be changed with regular intervals. How often it needs to be replaced depends on the usage of the car. A car that is used a lot on track needs replacement once every year or even more often, whilst a car used mainly on the road can cope with more infrequent intervals.
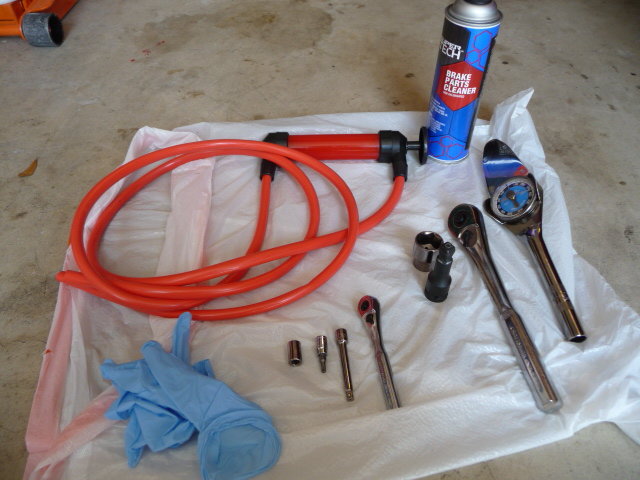
Materials Needed
- Jack and jack stands
- 24mm socket
- wrench and torque wrench
- T25 hex bit
- 10mm socket
- Fluid transfer pump (optional) or funnel and hose
- Drain pan (able to hold more than 3 liters)
- Brake cleaner (optional)
Step 1 – Warm up the car
Go for a 5-10 minute ride to warm up the transmission fluid. This will make it easier to get all the transmission fluid out later. You can let the car cool down for about 20 minutes after the ride to make sure that you don't burn yourself during the drain.
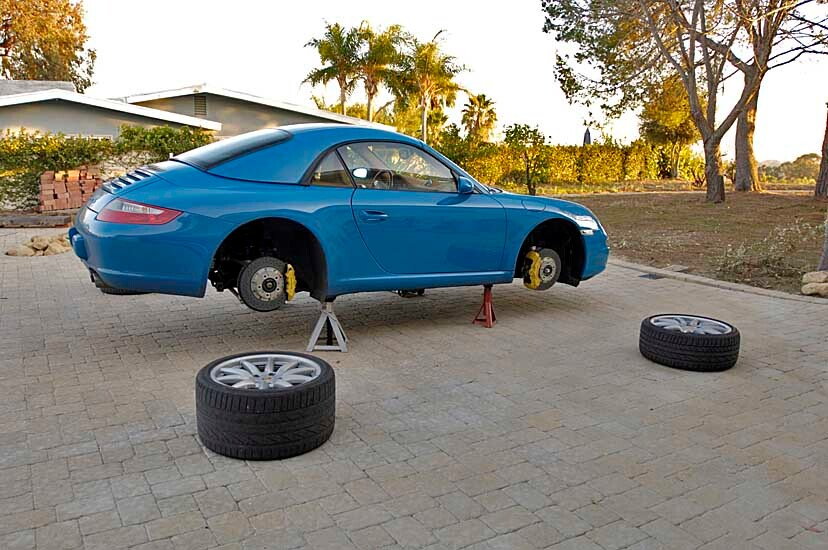
Step 2 – Jack up the car and put it on jack stands
Jack up the car and put it on jack stands. Make sure that the car is level. This is important in order to be able to get the correct amount of transmission fluid in the transmission later.
(Related Article: How to Jack Up Your Porsche 997 - Rennlist.com)
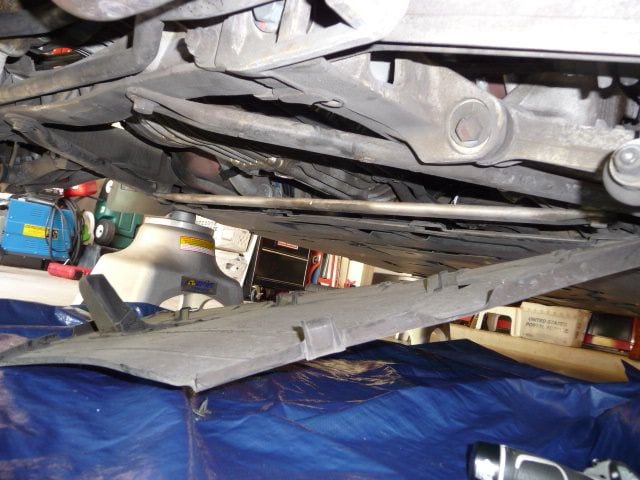
Step 3 – Remove the two rear under panels
Get under the car and remove the two rear plastic under panels. The panels are held in place with a couple of nuts and hex bolts. Use a 10 mm socket and a T25 hex bit to remove the panels.
Step 4 – Drain the old fluid
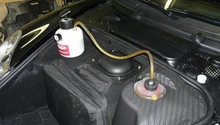
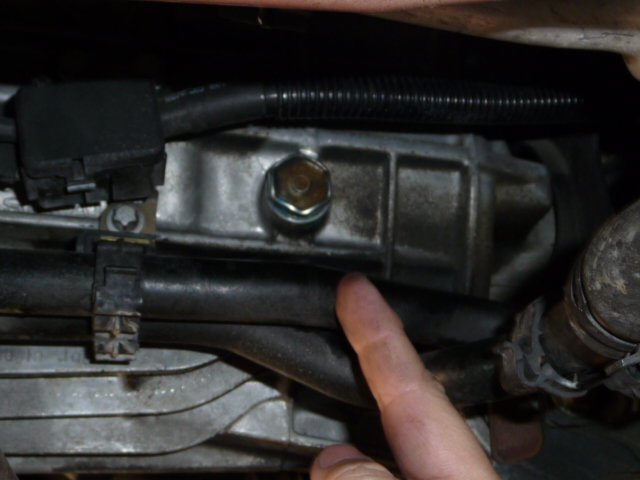
Step 4A: Loosen and remove the fill bolt from the transmission. The filling plug is located on the passenger side of the car. Be careful to find the correct fill plug since there are two plugs on the right side of the transmission. The correct plug is the one facing the front of the car and located a bit lower than the other plug.
Do this first every time, because nothing is worse than cracking the drain bolt open and dumping out all of your transmission fluid only to find that you can't get the filler plug undone. Also, having the transmission "open" on the other end helps create a vacuum and expels the fluid faster from the drain plug.
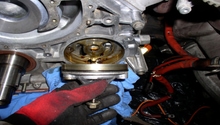
Step 4B: Use a 24mm socket and a wrench to remove the transmission drain plug. The drain plug is located at the bottom of the transmission. Inspect the drain plug for shavings. Since the drain plug is magnetic, you could diagnose the wear of your transmission. If you have a lot of shavings, you should consider replacing the transmission fluid more frequently than before.
Warning
Be careful not to burn yourself on the transmission fluid. If you remove the plug right after you drive your car, the transmission fluid could be very hot.
Draining the transmission will take about 10-15 minutes. At this point, it might be nice to stop and grab a cold beverage (wrench responsibly). The transmission holds about three liters. Wait for the slow drip, drip, drip of the the transmission fluid to stop, and refasten your drain plug. Don't crank this plug on there; much like the engine oil drain plug, the torque spec for it is 15-20 ft.-lbs.
Pro Tip
It is very important to use the correct filler plug. Since the other plug is located a bit higher than the correct plug, using that plug will result in overfilling the transmission with fluid. This makes the gear shifting harsh and can ruin the transmission.
Step 5 – Fill transmission with new fluid
When the transmission is completely drained, re-install the drain plug in the transmission and torque it to factory specifications (about 20 ft.-lbs.). Leave the filler plug off if you already removed it, or remove it now if you didn't previously (shame on you).
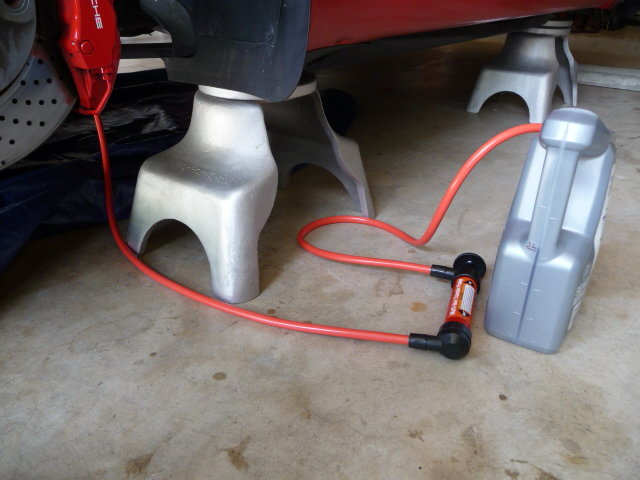
Use a fluid pump to get the transmission fluid into the filler hole. Simply put the hose in the filler hole and start filling.
If you don't have access to a fluid pump, you could use a funnel and a hose. Simply put the hose in the filler hole and the funnel in the other end of the hose. Remember to keep the funnel higher than the filler hole to make it possible to fill the transmission. Route the hose out next to the car.
When you notice that some transmission fluid is dripping out from the filler hole, you have reached the correct level of fluid in the transmission. This is why the car needs to be level during the procedure.
Step 6 – Re-install the filler plug
When the transmission is filled with fluid, re-install the filler plug and torque it to factory specifications (about 20 ft.-lbs.). If you like, you could use some brake cleaner or degreaser to clean up the transmission fluid that you got on the outside of the transmission.
Step 7 – Tidying up
Screw back the under panels that you previously removed and lower your car to the ground. Start the car, clutch in, and move the shifter through all of the gears, including reverse. If everything seems okay when stationary, go for a test drive. Upon returning, park the car and check for leaks. If everything looks good, then you are done.
Related Discussions
- Gear Oil Change - Rennlist.com
- Frequency of Transmission Fluid Change - Rennlist.com
- Changing Transmission Fluid - Rennlist.com