Porsche 993: How to Replace Your Exhaust
The exhaust system in the Porsche 993 is modular in design, meaning it is composed of several different pieces that can be individually replaced. Most owners use this as an opportunity to fine tune the sound of the exhaust system to their liking. Learn how to replace your 993's exhaust here.
This article applies to the Porsche 993 (1993-1998).
A car's exhaust system is one of the most popular modifications for any car enthusiast. For the Porsche 993, there are a wide variety of exhaust choices to give owners the exact exhaust note they are looking for. Although there are usually minimal performance benefits of an aftermarket exhaust system fitted to a 993, owners report that the improved sound quality greatly improves the driving experience. The exhaust system on the 993 is easily accessible from underneath the vehicle, and can be changed relatively quickly. So, whether you are looking to add a new set of mufflers for a bit more exhaust growl, or a full exhaust system for your track monster, this guide will walk you through the replacement of the various exhaust components on naturally aspirated 993 models.

Materials Needed
- Floor jack and jack stands
- Phillips screwdriver
- Metric wrenches
- Metric sockets
- Ratchet and extensions (various lengths)
- Allen wrenches or Allen sockets
- Penetrating oil
- Torch
- Hammer and rubber mallet
- Chisel
- Drill and drill bits
- Torque wrench
- Anti-seize paste
The 993 exhaust system is composed of the mufflers, catalytic converter, and heat exchangers/headers. Each of these components can be removed separately of one another. Feel free to deviate from the order of the following steps depending on what exhaust component your are replacing.
Step 1 – Lift the car and remove undertray
- To best gain access to the exhaust system, lift the car and support it with jack stands.
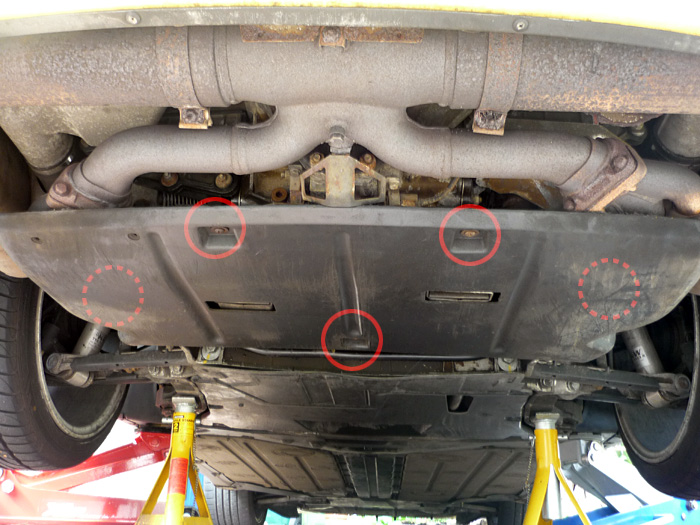
- With the car raised, remove the engine undertray.
(Related Article: How to Jack Up Your Porsche 993 - Rennlist.com)
Pro Tip
While not required, removal of the rear wheels will allow extra room to work on the exhaust system.
Step 2 – Remove exhaust tips
The exhaust tips are easiest removed with the mufflers still in place. The tips often become frozen to the muffler and can benefit from a liberal application of penetrating oil to aid in removal.
- Loosen the clamp fasteners securing the tips to the mufflers using a pair of 13mm wrenches.
- Spread the clamps with a pair of pliers or a small pry bar to relieve pressure.
- Remove the tips from the muffler. It may be necessary to apply a bit of heat using a handheld propane torch to allow the tip to expand. Also, a rubber mallet may come in handy to tap the tip off of the muffler.
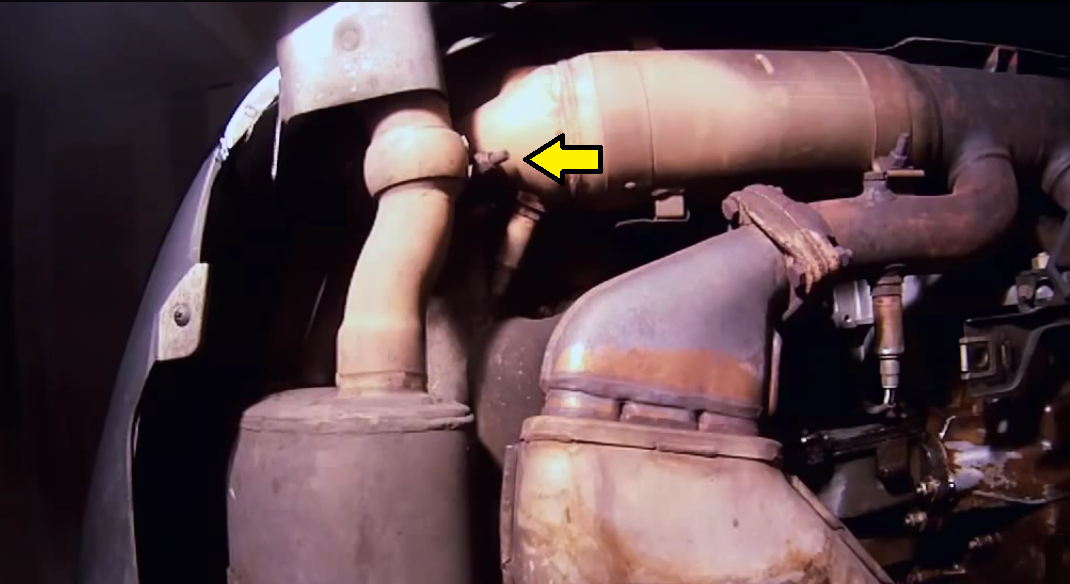
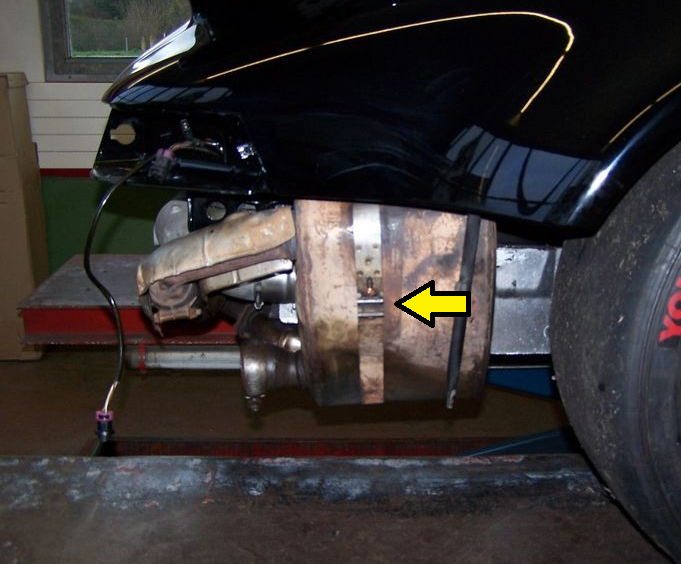
Figure 2. Exhaust tip clamp. 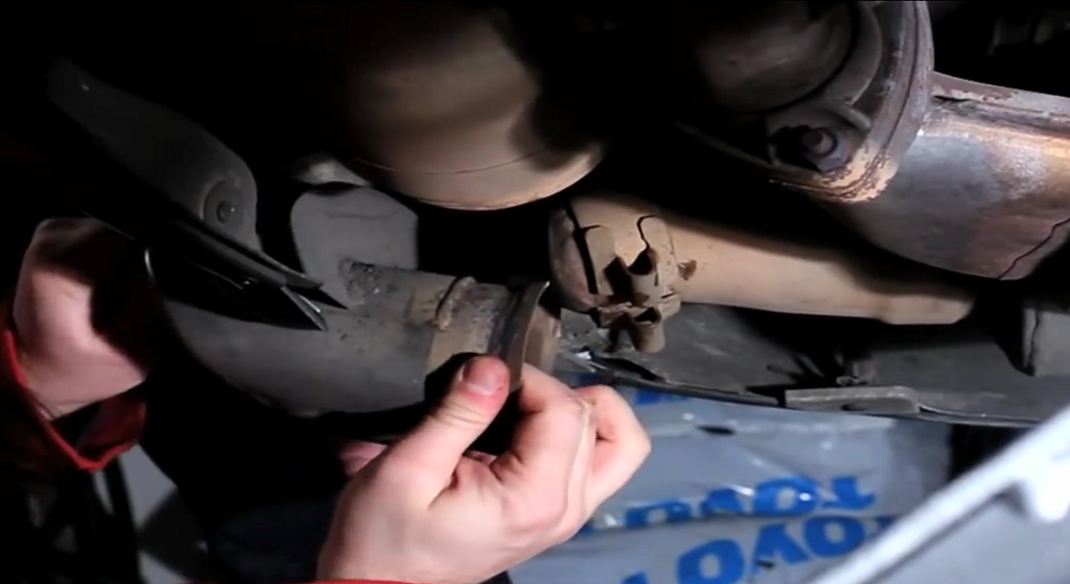
Figure 3. Tip removal.
Step 3 – Remove mufflers
- The muffler inlet piping is attached to the catalytic converter in the same way the tips were attached to the muffler. Loosen each clamp by undoing the fasteners with two 13mm wrenches and spread the clamp open.
- Undo the muffler retaining strap on each muffler and slide out of the way. For early 993 models, use a 13mm socket to undo the fastener. The 1996+ models require a 6mm Allen/Hex socket for removal.
- With the clamp and retaining strap loosened, the muffler should be ready for removal. It may take a bit of wiggling and rotating before it will drop out.

Step 4 – Remove catalytic converter
Removal of the catalytic converter is a bit more involved as the fasteners are typically corroded and often break. Additionally, the heat shield fasteners are a bit difficult to reach with the bumper on. However, with a bit of patience, removal of the cat is straightforward and be completed without disassembling the rear of the car.
Pro Tip
It is highly recommended that all fasteners be lubricated with penetrating oil well in advance of removal.
- Remove the catalytic converter heat shield fasteners using a 6mm wrench or a long pair of vise grips. It is a tight squeeze to reach these fasteners, but they are typically rusted and will usually snap off when pressure is placed upon them. If the fasteners break, do not worry as the remainder of the bolt will remain in the cat and can be removed when it is out of the car.
- Remove the catalytic converter retaining straps. These are usually frozen in place. Most owners typically cut these straps off as new straps are often installed with the new exhaust component. If attempting to remove, use a 6mm Allen/hex wrench (or 13mm socket for early cars) to undo the straps.
- FOR 95 MODELS: Remove the support bracket that covers the oxygen sensor located in the middle of the catalytic converter.
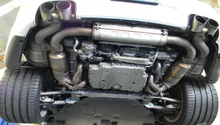
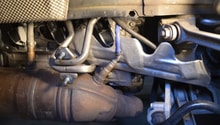
- Remove the O2 sensors. Early 993s have only one sensor located in the middle of the catalytic converter. 1996+ models have 4 O2 sensors as can be seen in the photo below.
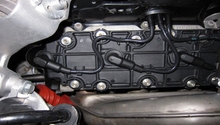
- Lastly, remove the flange bolts securing the catalytic converter to the heat exchangers using a 13mm socket and breaker bar/long handled ratchet for leverage. These bolts typically require some heat from a torch for removal. It is not uncommon for these bolts to break off while trying to remove them. Drilling or chiseling of the broken bolts may be necessary for final removal of the catalytic converter.
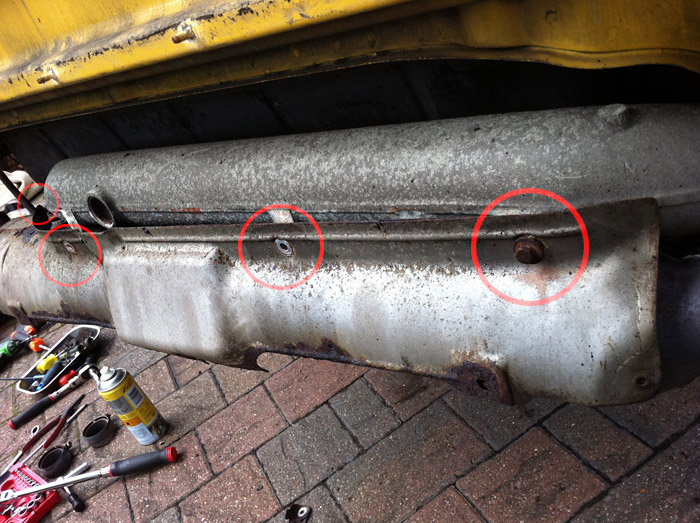
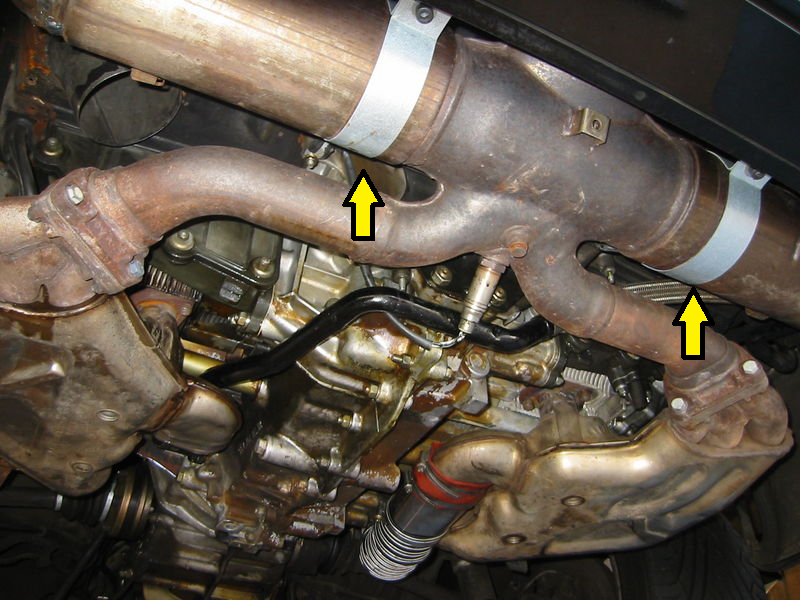
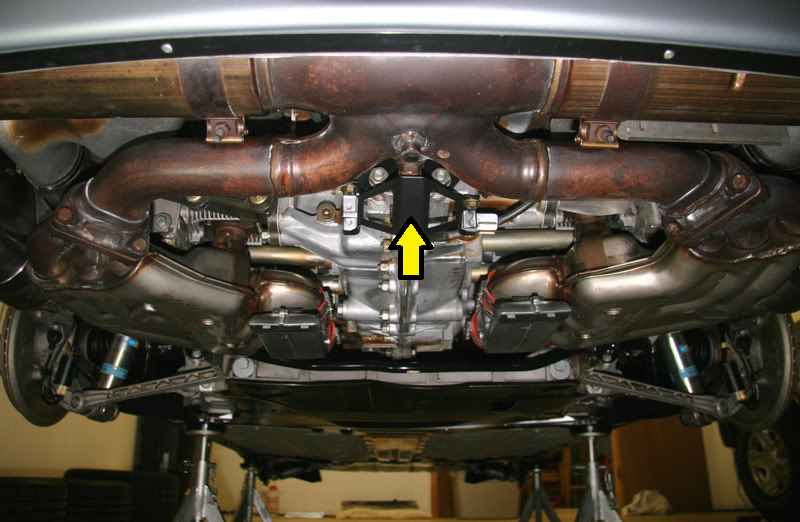
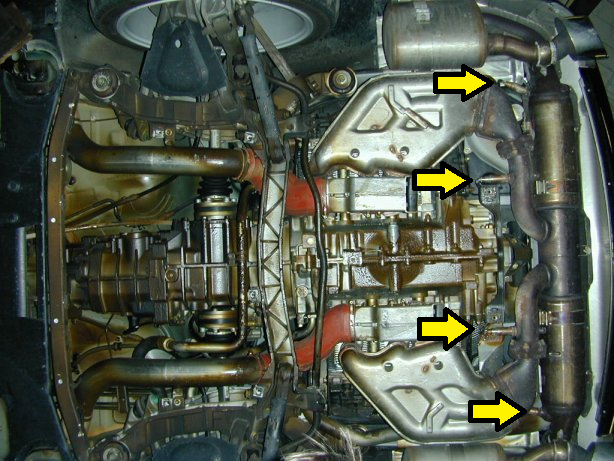
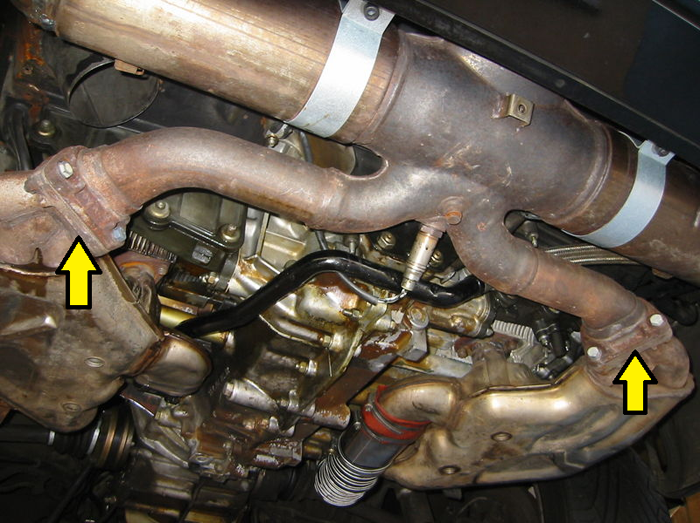
Figure 10. Cat flange bolts. 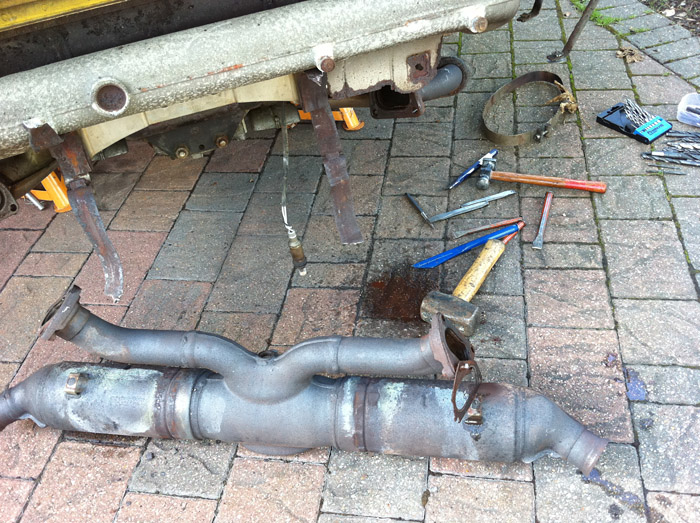
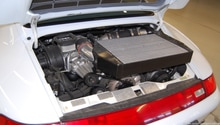
Figure 11. Catalytic converter removed from vehicle.
Step 5 – Remove heat exchanger/headers
Most individuals do not modify the stock heat exchangers in order to keep a functioning heater in the car. However, if yours is damaged or you are building a track car and no longer have use for the heater, follow these steps for removal.
- Disconnect heater hoses from heat exchangers and heater control boxes.
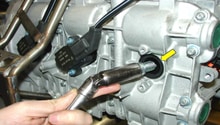
- Remove the nuts securing the heat exchangers to the cylinder heads. It is recommended the nuts be soaked in penetrating oil as well as heated with a torch to allow for easier removal. It is worth noting that many cars often have a mixture of different sized nuts on the heat exchangers, especially if they have been removed at some point in the car's life. Have 12mm and 13mm sockets and wrenches on hand . Be sure of the sizing before trying to remove the nuts to prevent rounding off of the fastener.
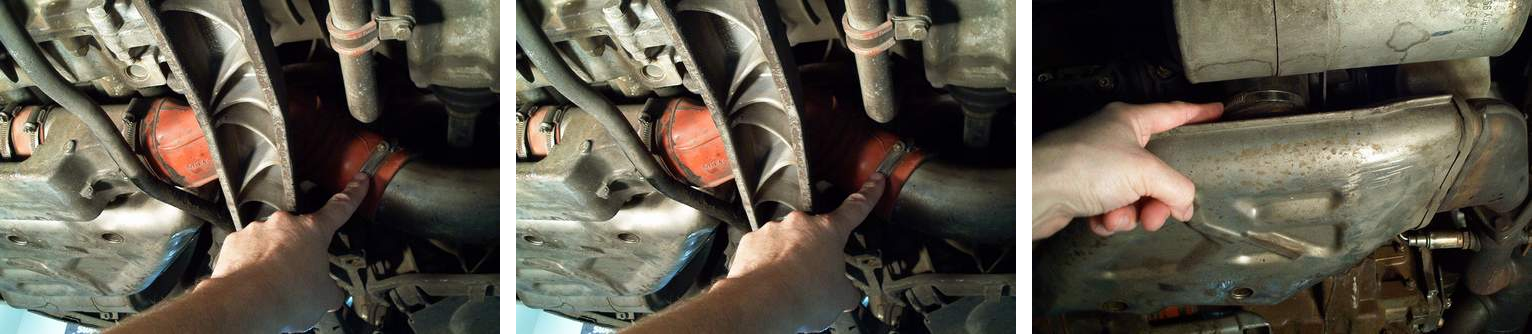

Figure 13. Removing heat exchanger nuts. 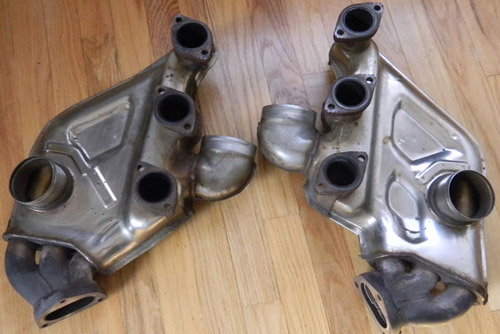
Figure 14. Heat exchangers removed.
Step 6 – Reinstallation
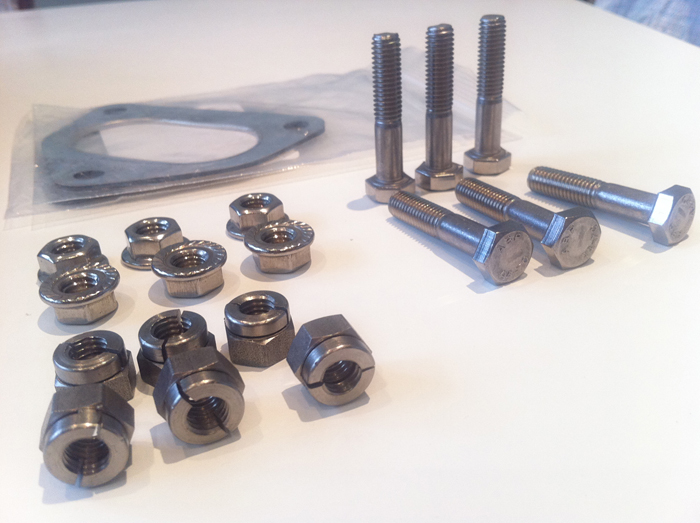
With the 993 exhaust being modular in design, most aftermarket component fittings will match up to those of the stock components without modification. Reinstallation of replacement or aftermarket exhaust components simply involves bolting the new part in place with new gaskets, straps, and fasteners, and tightening to spec. It is recommended that parts be reassembled with stainless steel fasteners lightly coated in anti-seize. This will allow exhaust components to be easily removed in the future if necessary.
Torque specifications:
- Heat exchangers/Headers to cylinder heads: 17 ft-lbs.
- Heat exchangers/Headers to catalytic converter/cat bypass: 17 ft-lbs.
- Muffler & exhaust tip clamps: 18 ft-lbs.
- Muffler straps: 15 ft-lbs.
- Catalytic converter straps: 15 ft-lbs.
- O2 sensors: 37-44 ft-lbs.
Related Discussions
- How Do I Get the Stock Exhaust Tips Off? - Rennlist.com
- Slippery Slope Exhaust Mods - Rennlist.com
- Is It Possible to Remove the Heat Exchangers? - Rennlist.com
- 993 Exhaust Options - Rennlist.com