Porsche 997: How to Replace Air Filter
A clean air filter is required for your engine to breathe properly and operate at its peak performance. Removing and installing a new air filter is a simple process. Here's how.
This article applies to the Porsche 911 997 (2005-2012).
In order for an engine to work properly and efficiently, it must be able to breathe. This requires that the air entering the engine and the air exiting the engine can do so freely. The air filter element on your Porsche 997 is there to keep debris and dirt from getting into the engine. After a certain amount of time it will have collected enough dirt and debris that it will need to be changed. Here's how to replace it yourself.

Materials Needed
- Phillips head screwdriver
- Flat head screwdriver
- Torx set
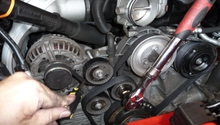
Step 1 – Remove the cable plug for the switch resonator in air box housing
The cable plug for the switch resonator is located at the top right of the air box housing. It is indicated as number 1 on the diagram in Figure 1.

Step 2 – Disconnect the mass air flow sensor
Press together on the locking levers on the plug and pull the plug off the flange. The mass air flow sensor is indicated as number 2 on the diagram in Figure 2.

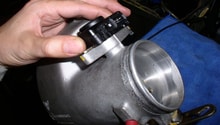
Step 3 – Loosen clamp that holds rubber sleeve to throttle body and un-clip oil filling tube
The next thing you will want to do is use your flat head screwdriver to loosen the clamp that connects the rubber sleeve to the throttle body (Number 1 on the diagram in Figure 3). After this is done, you can uncap the oil filling tube (Number 3 on the diagram in Figure 3). You can also lift the air cleaner housing off the fastening lug (Number 4 on the diagram in Figure 3).
Step 4 – Un-clip switch over valve for switch resonator
Next, unclip the switch over valve for the switch resonator from the housing bracket and detach the vacuum line which will allow you to disconnect it from the resonator. The switch over valve is number 1 on the diagram in Figure 4, and the vacuum line is number 2.

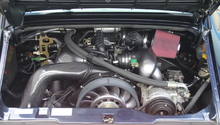
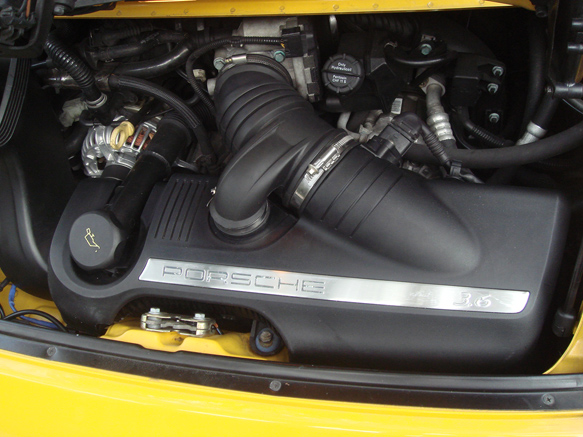
Step 5 – Remove air box housing from engine compartment
Now that everything is disconnected, you can remove the air box housing from the engine compartment.
Pro Tip
Clean off the outside of the air box before proceeding. You don't want the dirt that could possibly be on the outside of the air box to somehow get inside the air box.
Step 6 – Separate the air box housing
There are 8 Torx screws that join the two Air Box Housing halves. You will need to use your Torx set to loosen these screws so you can separate the two halves and gain access to the air filter element.

Step 7 – Remove and replace air filter element
Now that you have the air box separated, you will be able to remove and replace the air filter element with a new one.

Pro Tip
While you have the air filter element out, make sure to clean out any dirt and debris that is trapped in the air box housing.
Step 8 – Repeat steps in reverse order to re-install air box housing
Repeating Steps 1-7 in reverse order will allow you to reassemble the air box housing and re-install it back into the engine compartment.
- Reassemble the air box housing.
- Re-install air box into engine bay.
- Refit all the vacuum lines and sensors.
- Connect the air box back to throttle body.
- Confirm that everything is fastened down correctly.
- Start the car and listen for unusual noises or vacuum leaks.
Related Discussion and Site
- Changing 997.2 Engine Air Filter - Rennlist.com
- Replacing Your Porsche Carrera Air Filter - Pelicanparts.com