Porsche 928: How to Seal Windshield
A leaking windshield is no laughing matter. You don't want to get to wet, and you certainly don't want your interior to get wet. If your windshield is leaking somewhere around its edge, then you can easily replace the molding or simply add a little sealant.
This article applies to the Porsche 928 (1979-1995).
Windshield leaks can happen over time as a car gets older. Replacing the molding that holds your windshield in place is one way of addressing a leak in your windshield. You also can reuse your existing molding, which will save you some money, and address the leak by adding a silicone-based sealant. The sealant should form a watertight seal and stop future leaks from occurring. Read on to learn how to repair a leaky windshield.

Materials Needed
- New molding
- 10mm socket (optional)
- Putty knife (optional)
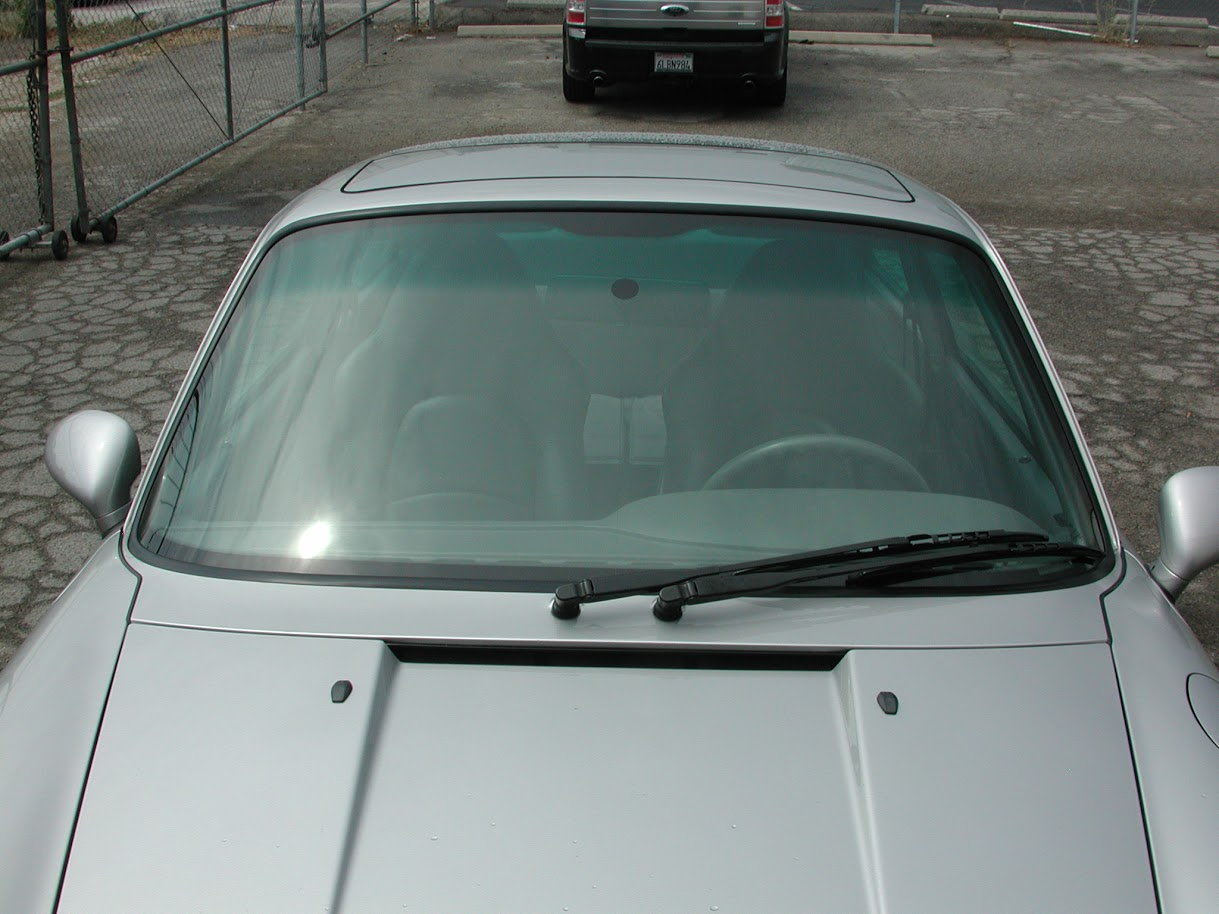
Depending on your specific model, it may be necessary to remove the windshield wipers for access before starting.
Step 1 – Remove the windshield wipers (optional)
If your windshield wipers are in the way of replacing the molding, then it's necessary to remove them. At the base of the wipers there is a 10mm nut. Flip the cover to expose it, and then remove it. Flip the wipers upright and pull them off the spindle. Remove the circular piece of trim at the base of each wiper arm that is sandwiched between the arm and the cowl. Next, locate the rear most upper fender bolt that you can see with the hood open and unbolt it. Finally, remove the screws at either end of the cowl.
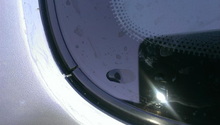
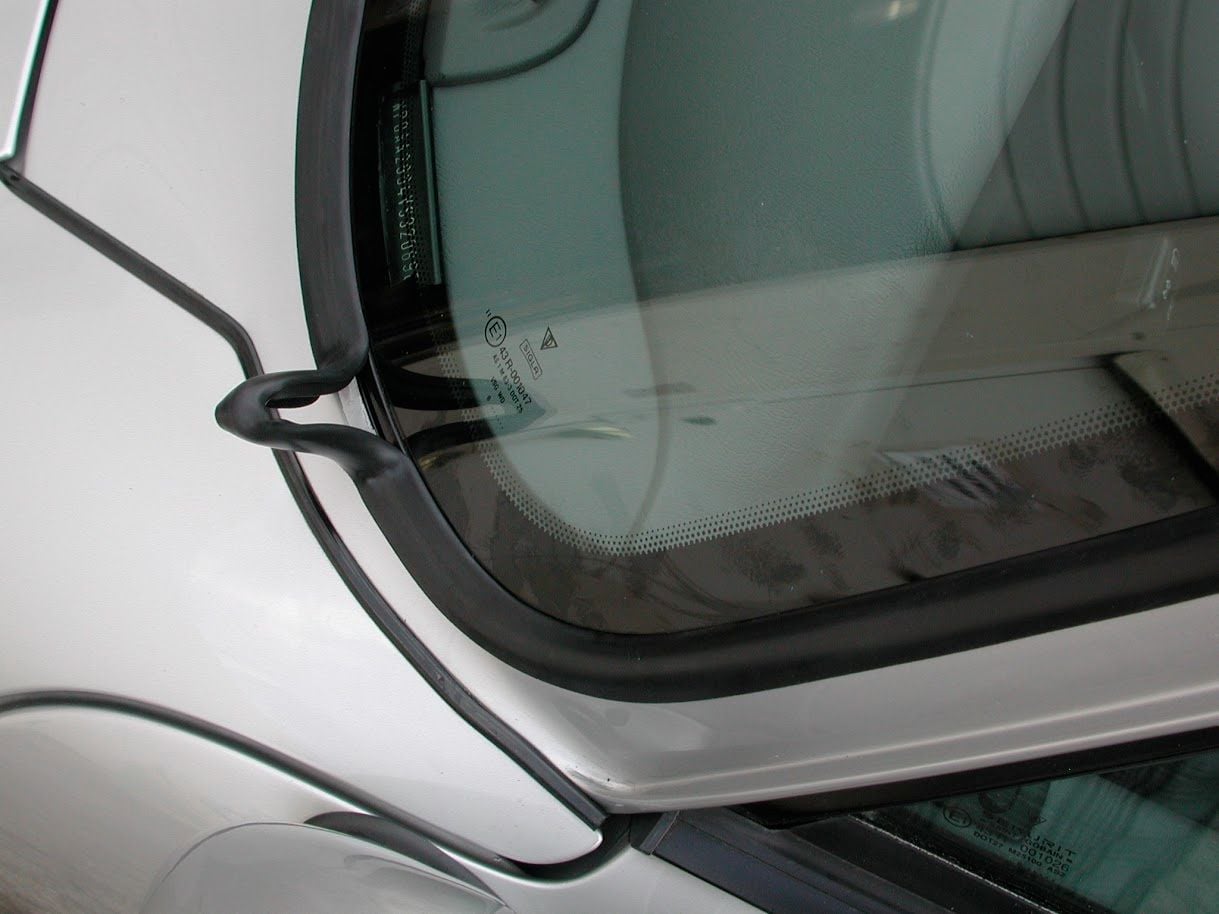
Step 2 – Remove clips on sides of windshield
Remove clips on sides of windshield. There are two on each side, and you should be able to push them off. To do this, feel under the rubber seals for the clips and push each clip toward the center of the windshield, and then you should be able to lift them off.
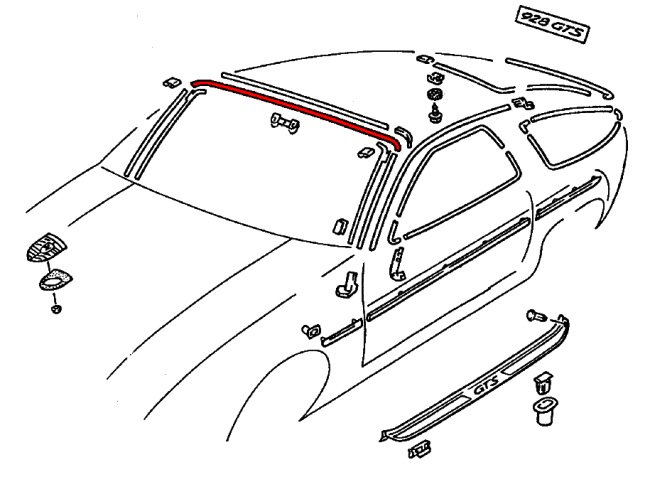
Step 3 – Remove clips in the front top molding
Remove the nine clips that are along the front top molding. They are spaced between eight and 10 inches apart. These clips should slide up, and then you should be able to remove them.
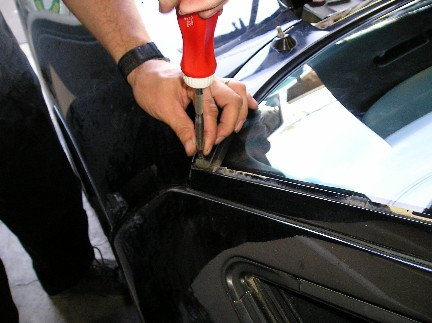
Step 4 – Remove molding
Remove molding. Start at one end and lift it out of its channel. Go slow. The faster you go, the more likely you are to rip or stretch out the molding. Also, avoid putting weight on your windshield. The more weight you put on it, the more you risk cracking or outright breaking it.
Step 5 – Add sealant (optional)
If you’re simply planning to replace the molding and not add sealant, then skip this step and go to Step 5. Add sealant in molding channel. You can use a silicone-based sealant, which should prevent future leaks. Start at bottom center of windshield and work your way around the edge until you've completely added sealant.
Step 6 – Install new molding
Press one end of the new molding into the bottom center of the windshield channel (also called a gasket), and then install the molding around the entire edge of the windshield. You must press the molding firmly in place to prevent it from leaking. One Porsche owner used the handle of a putty knife to help press the molding in place.
Step 7 – Re-install clips
Re-install the nine clips along top edge of windshield, and then re-install the two clips on each side of the windshield.
Step 8 – Test for leaks
After waiting for the sealant to cure (read the directions to confirm the "set time" of the sealant), pour water on your windshield and test for leaks. Keep in mind that a leak may not present itself until after you've been in the rain for a while. But this is a good way of detecting any larger leaks now before you actually get caught in a storm.
Related Discussions
- Removing Windshield and Installing Seal Adhesive - Rennlist.com
- Windshield Replacement with Pics - Rennlist.com
- DIY: Sealing the Windshield and Rear Window on a Porsche 993 - Rennlist.com
- Sealing Windshield/Molding - Rennlist.com