Porsche 993: How to Replace Rear Shocks
Looking to stiffen up the suspension a little? Here's how to replace the rear shocks in the Porsche 993.
This article applies to the Porsche 993 (1993-1998).
The OEM shocks that came with your Porsche 993 have most likely given you many miles of smooth, comfortable rides, but after a while, there may seem to be something missing. Do you feel like you are going to slide into the passenger seat on right hand turns? If you are tired of your car really rolling in the turns and your suspension just seems to be a bit soft or mushy, then replacing those OEM rear shocks with some nice, high performance aftermarket ones may be just the solution. One of the more popular choices is to install some Bilstein shocks to really stiffen the suspension and to flatten the ride out in the corners. A drawback for this is that they also transmit every bump in the road up through the cockpit. Koni makes a shock that isn't mushy and that takes corners like a high performance sports car. Whichever brand you choose, save yourself a ton of money by replacing the rear shocks yourself. The job itself is not too difficult for a novice to complete; there's just some cramped places to work around, and a spring tension tool is needed.

Materials Needed
- Hydraulic floor jack
- Chocks
- Jack stands
- Rubber mallet
- Socket set (13 mm), ratchet
- Hockey pucks
Step 1 – Lift the car, place on jack stands and remove wheels
Since most folks do not own a lift in their garage, we'll need to use jack stands in this step. Raise the rear end of the car with a hydraulic floor jack. If you have a flat metal piece or a cup for the pad of the floor jack, it's a good idea to place a hockey puck on it before you jack, and place the car on jack stands in the approved locations. If you are not lifting all fours, then you will need to chock the front wheels to prevent the car from rolling. Remove the rear wheels.
(Related Article: Porsche 993: How to Jack Up Your Car - Rennlist.com)

Step 2 – Remove sway bars
Remove the four 13 mm bolts that hold the rear sway bar in place via U-shaped brackets on either end of the bar.
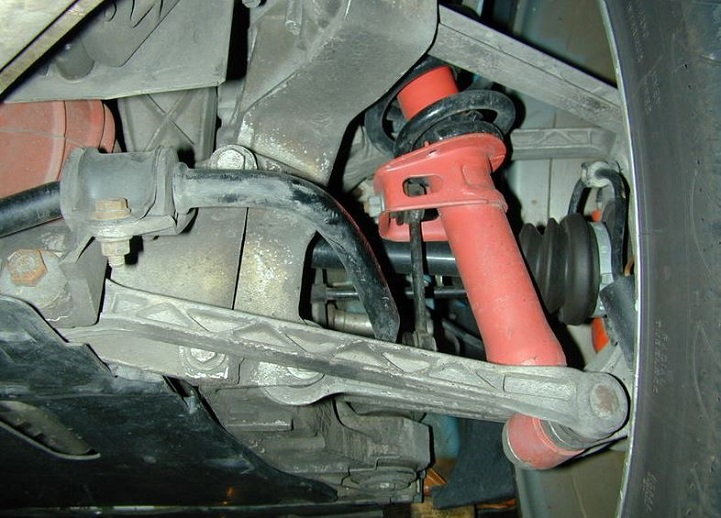
Step 3 – Remove sway bar end link bolt
Remove the bolt that connects the sway bar to the rear shocks. Use an open end wrench in between the bolt and the link in order to hold the shaft in place. This can be a bit tricky.

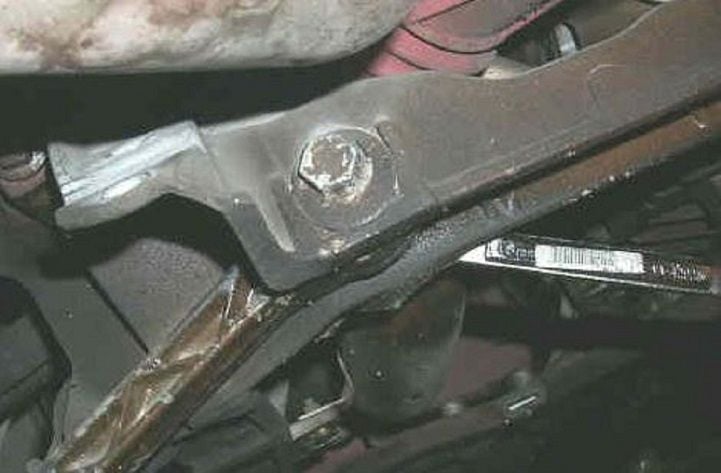
Step 4 – Remove the lower suspension arm
The bolt that holds the lower suspension arm must be loosened from the inside of the arm, not the outside which is visible from looking at the rear of the car. Get behind the arm and loosen the bolt. The large bolt in Figure 4 is the toe adjustment bolt. Mark the position of this bolt so that upon re-assembly, it can be put back to normal specs and possibly avoid a full alignment. The bolt cannot fully come out because it hits the heat exchanger. Use the floor jack to lift the engine at the jack point just slightly. This will allow the bolt to clear the exchanger. Hit the arm with a rubber mallet to knock it down. It will still be connected to the hub assembly. Use either a Torx bit or an impact wrench to remove the bolt connecting the arm to the hub assembly, and the entire arm will then be removed.
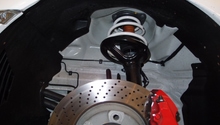
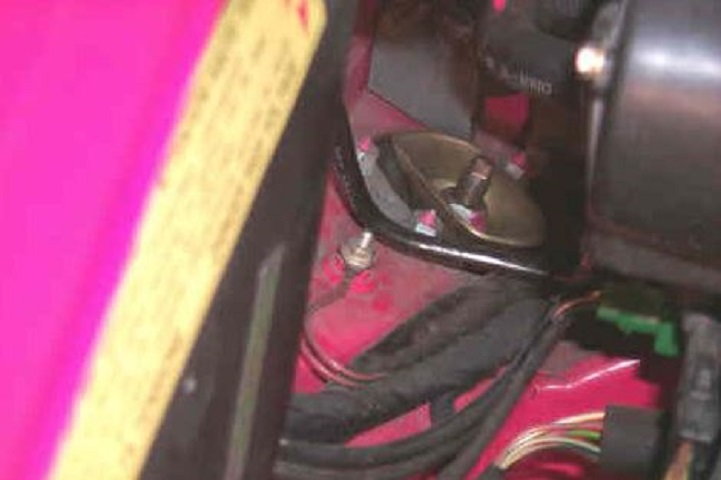
Step 5 – Remove the four shock-tower mounting bolts
You will have a tight squeeze from the engine bay to reach the four 13 mm shock-tower bolts. A stubby ratchet is perfect for this job.
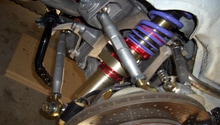
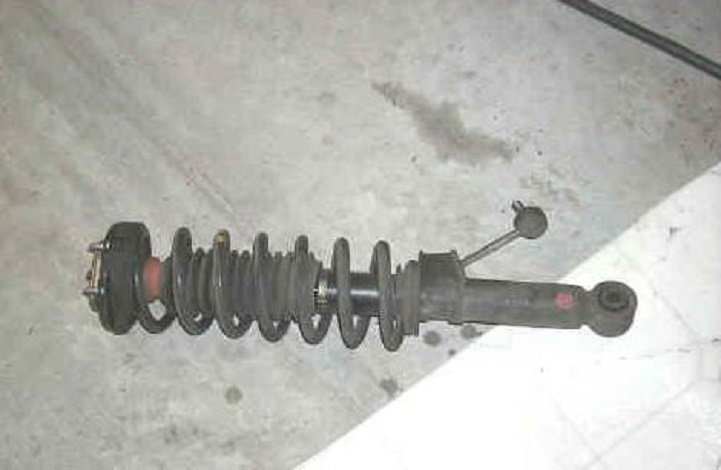
Step 6 – Remove the coil from the shock assembly
With the tower bolts removed, the shock coil assembly can slide out from the hub. Use a spring compressor to remove the coil and re-use the perch assembly on the replacement shock so it can easily be re-mounted to the tower.
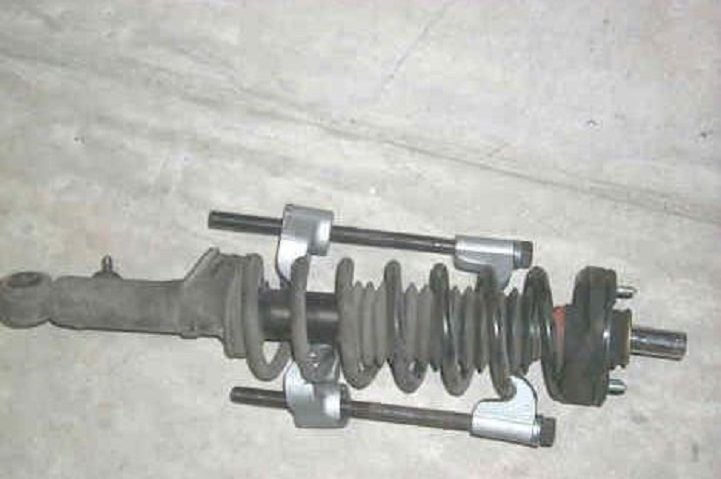
Step 7 – Transfer tower perch to new shock
Use a spring compression tool to compress the spring so that the bolt can be removed from the top of the shock and the perch assembly can be placed onto the new shock. Use a Torx to hold the shaft, and use a socket to remove the sway bar link from the original shock and transfer it to the new shock. An extra set of hands is invaluable while you place the new shock assembly up into the hub and replace the four 13 mm tower bolts. The sway bar link can be reconnected, and you are done. Double check the position of the toe adjustment bolt and line it up as it was originally. Complete the other side and re-install the sway bar.
Related Discussions and Site
- Rear Suspension Change - P-car.com
- Rear Shocks: How Hard are They to Replace? - Rennlist.com
- 2004 GT3 Rear Shock Replacement Procedure - Rennlist.com