Porsche 997: How to Install Lowering Springs
Adding lowering springs will make your Porsche stand out from the crowd. Learn how to do this modification yourself on the cheap.
This article applies to the Porsche 997/911 (2005-2012).
If your Porsche 997 is starting to look like a German monster truck, perhaps it's time to consider lowering that high performance sports car. If you want to make it a true low rider, you have a little work to do. Adding lowering springs to your Porsche isn't a highly technical job, but it does take a bit of muscle and old fashioned elbow grease. You will do some heavy wrench work, but it is not a difficult task. Doing this job yourself will be well worth your time in savings rather than taking it to a professional to do the job. Read on to learn how you can perform this modification in the comfort of your own garage.

Materials Needed
- Hydraulic floor jack and jack stands
- T25 Torx
- Bungee cord or strap
- 10mm Hex socket
- Spring compression tool or zip ties
- 21mm deep well socket
- 21mm strut nut tool
- Ratchet and various sized socket set
- Penetrating spray lubricant
- Loctite Threadlocker Blue
- Hammer
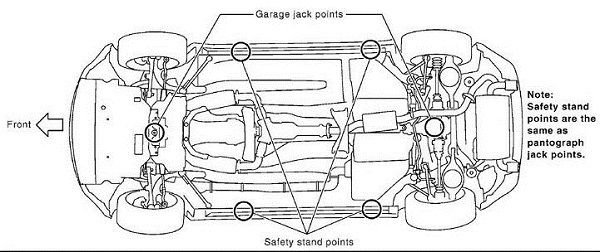
Step 1 – Lift your car
Use the hydraulic floor jack to lift your 997 at the proper jacking locations. Some owners have an aversion to using the engine as a jacking location, but the manufacture designates that as the proper location. You can jack from the rear jack points and set the jack stands under the suspension cross members. See the diagram below for the safe and suggested jacking points. Never work on your car without the jack stands in place.
(Related Article: How to Jack Up Your 997 - Rennlist.com)
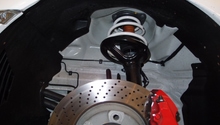
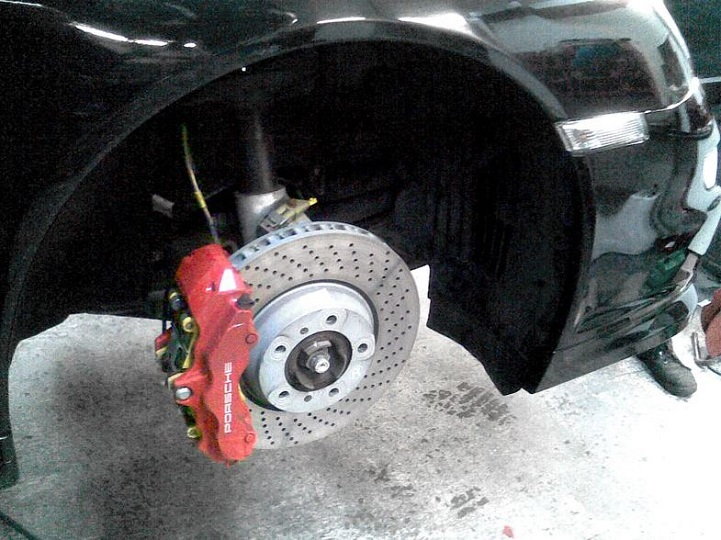
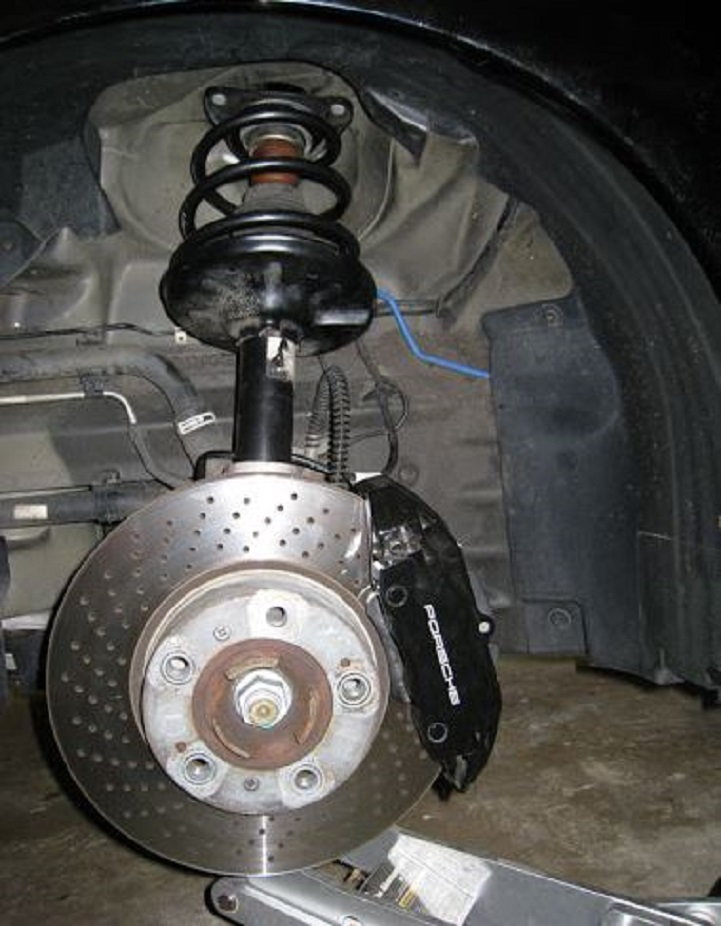
Step 2 – Remove brake caliper
You will never get the strut assembly out from the fender well if you do not remove the brake calipers. Use some kind of bungee cord, strap, or otherwise to hold the caliper up and out of the way. Don't let it hang from the brake line. The calipers are mounted using a 10mm Hex bit.
(Related Article: How to Replace Brake Calipers - Rennlist.com)
Step 3 – Break free strut mounting bolt
Use a size T25 Torx and remove the bolt in the front trunk that covers the strut tower mount. Use a 21mm deep well socket and break free the strut tower mounting bolt. If you do not break loose this Torx bit first, you will have much difficulty later on. Once you do break this nut free, the entire strut assembly will start turning as you turn the nut. It just needs to be broken free at this point.

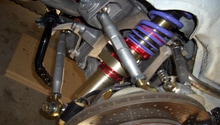
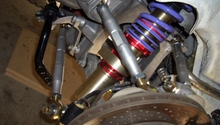
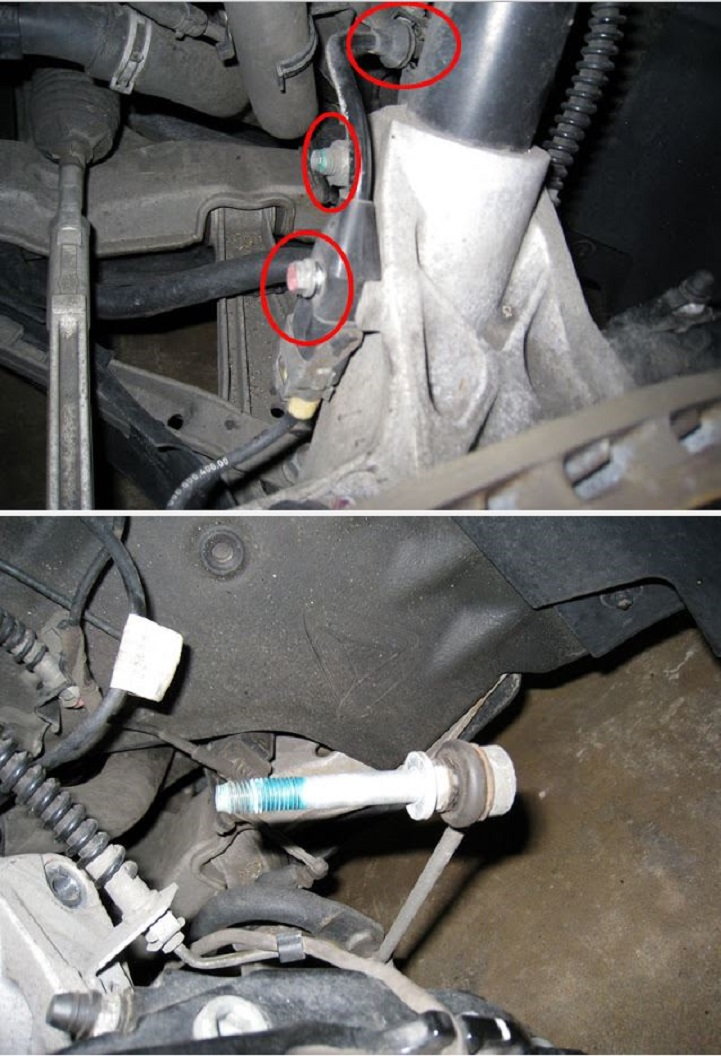
Step 4 – Remove strut bolts and end link bolt
Remove the two bolts holding the strut assembly in place, as well as the sway bar end link bolt that holds the strut onto the spindle.
Step 5 – Remove the strut tower
There are three mounting bolts holding the strut tower in place in the trunk. These three bolts are also used to adjust the camber alignment. The vehicle will need an alignment after this job is done anyway, so don't worry too much about these bolts. You should note their location and position. If you are using a spring compression tool, simply remove these three 13mm bolts. Take precaution because the entire strut tower is going to fall. Either use a second person or position something under the strut tower to catch it. Once it is free, it will take some manipulation to get it out from under the car.
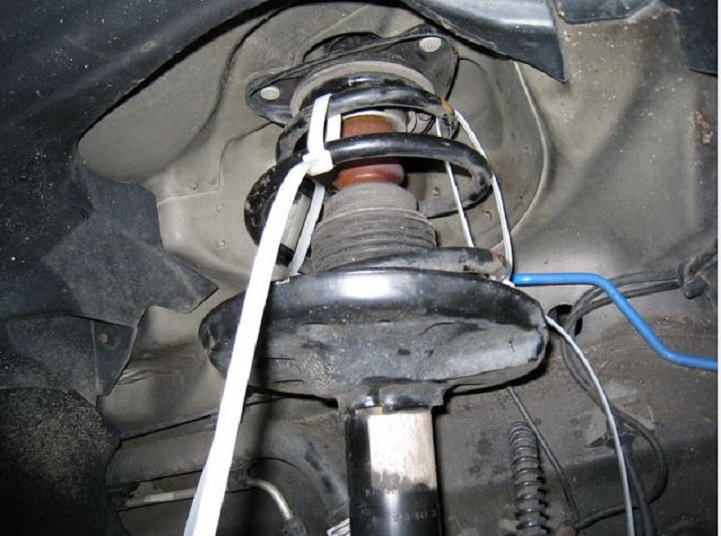
A second option, if you do not have a spring compression tool, is to pre-compress the strut spring before you dismount the tower. Slide the floor jack under the spring as well as strut assembly, and raise it up until the strut spring is compressed nicely. Once it is compressed, take some zip ties and secure the springs in their compressed position. The springs are not highly charged anyway, so a 75 pound tensile strength zip tie will do the trick. In this compressed state, the strut assembly will come out from the fender well much easier.
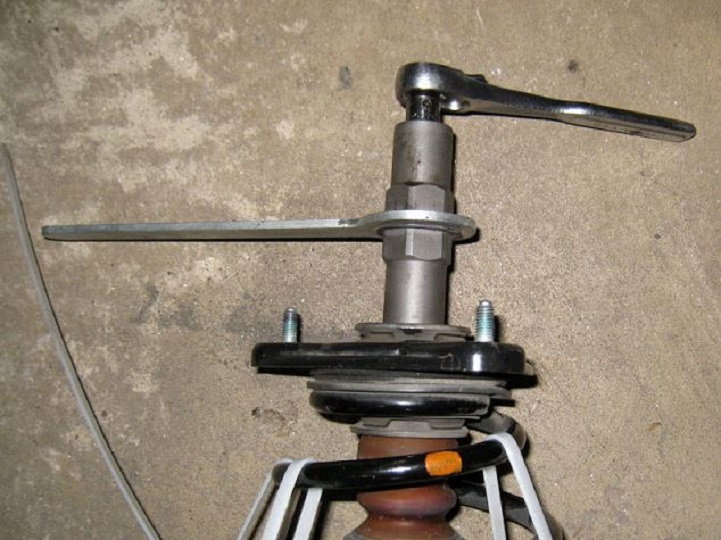
Step 6 – Remove the strut from the tower mount
Use a special strut nut tool to remove the 21mm nut on the strut tower. The tool keeps the strut from spinning as you turn the top mounting bolt.
Step 7 – Mount the new springs
Mount the new springs to the mounting tower. Since your lowering springs are shorter than the stock springs, you will not need to re-compress them to put back into the fender well and re-mount. Secure with the three 13mm mounting bolts. Replace the cover with the Torx 25 screw. Replace the caliper, secure with the 10mm Hex bolts, and torque to specifications. You may want to use Loctite Blue on the threads of all the bolts used.
Step 8 – Install the rear struts
The rear struts and springs will be installed in the same fashion as the fronts were installed; however, they are much more difficult with the following differences:
- Break free the 15mm tower mounting nut from inside the car.
- Remove both sway bar end links (16mm outer, 17mm inner).
- Remove the 16mm lower strut mounting bolt, which is a pain as you will need to use the floor jack underneath in order to line up the hole and the lower mounting bolt that passes through it. You may need to use a hammer to punch as well as tap this bolt out.
- When re-installing the rears, use a pry bar to line up the lower strut mounting bolt back through that hole.

With the suspension all assembled, remove your spring compressors, torque down all of the nuts securing the strut assemblies to the chassis, refit your brake lines and calipers. Then, lower your 911 off the jack stands.
Related Discussions
- Installed: H&R Sport Springs (How to Included) - Rennlist.com
- Eibach Springs Installed - Rennlist.com