Porsche 997: How to Remove Rear Bumper
Knowing the basics of removing body panels pays dividends when trying to access those tricky to reach areas. Learn how to remove the rear bumper here.
This article applies to the Porsche 997 (2005-2012).
Whether you need to replace a damaged rear bumper or you simply need to gain access to something under it, bumper removal can be frustrating if you don't know where to start. Unlike the olden days of cars, you don't simply remove a couple of bolts and pull a chrome-plated monstrosity off the bracket anymore. These days, safety technology and integrated styling have necessitated a different method of bumper attachment. Before you start hacking away at your old hunk of plastic, take a look at our guide on Porsche 997 bumper removal and do it right the first time.

Materials Needed
- Torx screwdriver
- Masking tape
- Plastic retaining clip tool or flat head screwdriver
- WD-40 or Rubeglide
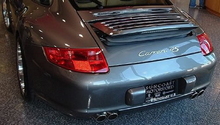
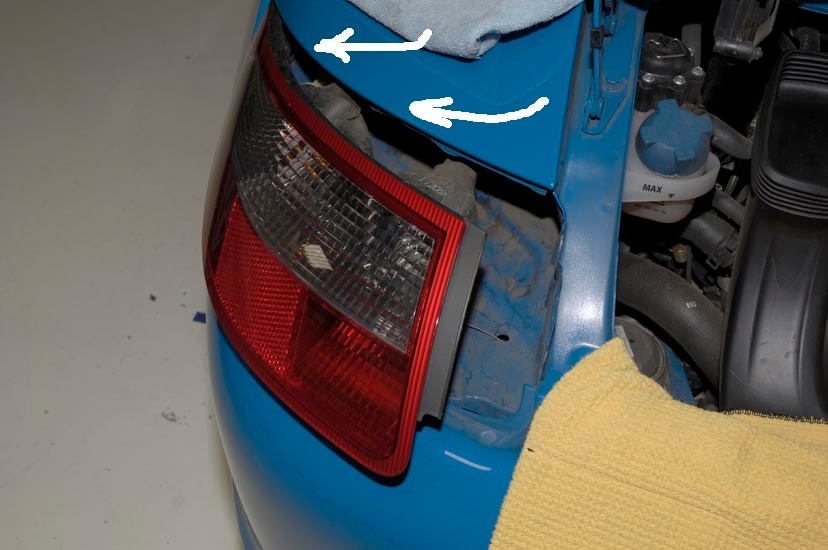
Step 1 – Remove tail lights
Raise the decklid and remove the Torx screws on the side of each tail light that hold them in place. Note how each assembly rests in place so that you will know how to reinstall them and what sort of gap they should have. Rotate each assembly to the outside of the car at the pivot point, which is a loose screw and a large plastic washer that retains each light in the proper position. Once you have rotated the assembly out, use tape to secure the parts so you don't have to mess around with the electrical disconnects.
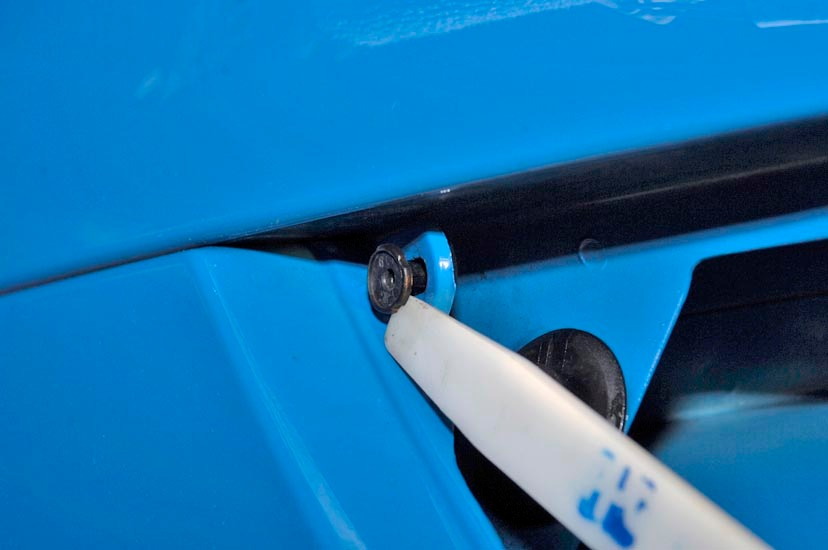
Step 2 – Remove bumper screws
There are a series of Torx screws that hold the bumper in place. There are four along the top side of the bumper that can be seen from the engine compartment. Remove them, followed by a small screw back inside the light assembly area. Next, remove the two screws aft of the rear wheels which face the ground. At the very aft of the car inboard of the exhaust pipes you will find two more screws which face the ground. Remove them, followed by the screws at the leading edge of the bumper cover where it meets the wheel opening. These can be hard to locate, but you can easily find them by running your hand alongside the cover.
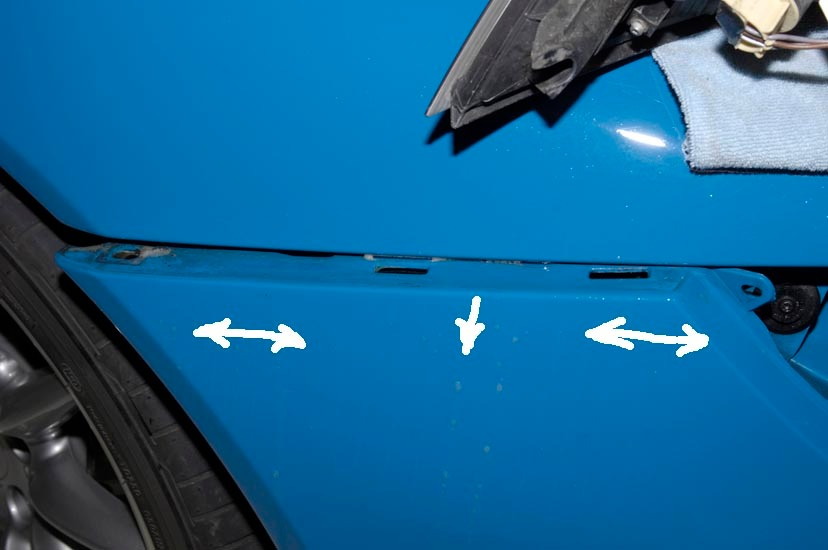
Step 3 – Remove plastic retaining clips
Remove the plastic retaining clip located in the tail light assembly area using a retaining clip tool or a flat head screwdriver. The next plastic clip is located on the bumper cover and keeps the bumper tight against the car's body. To make it easier to remove, spray this area with WD-40 or Rubeglide, working the cover from side to side to work it loose. Once loose, the clip should pop right out with minimal friction.
Step 4 – Remove bumper
Disconnect the electrical connector that attaches to the license plate lights. Use a flat head screwdriver to depress the tab on the inside of the bumper cover. Pull the bumper off, and you're done!

Step 5 – Refitting bumper
When it comes time to refit your current bumper cover, or install your replacement one, installation is the reverse of removal.
- Line up the bumper on the bumper attachment clips.
- Re-install all bumper clips, screws and fasteners.
- Re-install tail lights.
Related Discussions
- Repairing/Removing Rear Bumperettes Step By Step - Rennlist.com
- Rear Bumper Removal - Rennlist.com
- Bumper Repair - Rennlist.com